
Navigating Campflow
Everything in Campflow is organized around the sidebar on the left and the season picker at the top. Once you know where these are, you’ll be able to find anything.
The Sidebar
Section titled “The Sidebar”The sidebar is the menu on the left side of the screen. It’s always visible and gives you access to every section of Campflow.
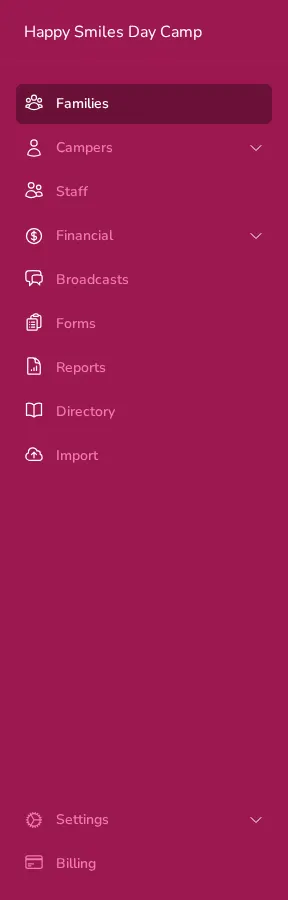
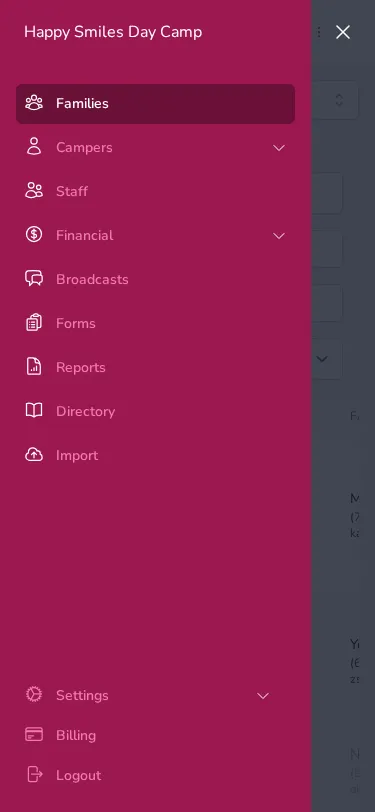
Here’s what each item takes you to:
- Getting Started — Shown at the top of the sidebar for new camps: a checklist that walks you through setup. It goes away once you finish or hide the Get Set Up guide.
- Families — The main list of all families in your camp. This is also the page you land on when you log in.
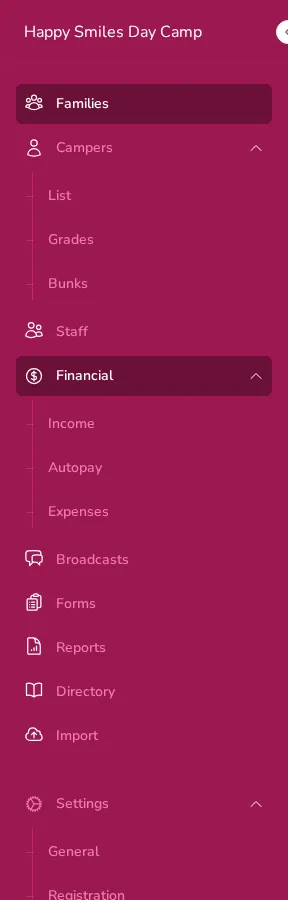
- Campers — Has three sub-pages:
- List — A table of all individual campers with their enrollment details.
- Grades — Manage your grade levels and see how many campers are in each one.
- Bunks — Assign campers to bunks and manage bunk details.
- Staff — Manage your camp staff, their assignments, and contact info.
- Financial — Has three sub-pages:
- Income — View and record payments from families.
- Autopay — Manage recurring payment schedules.
- Expenses — Track your camp’s expenses and budget.
- Broadcasts — Send messages to families by email, text, or voice call.
- Forms — Create and manage custom forms for collecting information from families.
- Reports — Run and export reports on campers, finances, and more.
- Directory — A listing directory (if enabled for your camp).
- Import — Bring in data from spreadsheets.
At the bottom of the sidebar, you’ll find:
- Settings — Camp configuration, registration settings, communication settings, and user management.
- Billing — Manage your Campflow subscription.
Expanding Sub-Menus
Section titled “Expanding Sub-Menus”Some sidebar items (Campers, Financial, and Settings) have sub-pages. Click the arrow next to the name to expand the menu and see the options underneath.
Collapsing the Sidebar
Section titled “Collapsing the Sidebar”If you want more screen space, you can collapse the sidebar to show only icons. Hover over the sidebar and click the small arrow button at the top-right edge. Click it again to expand the sidebar back.
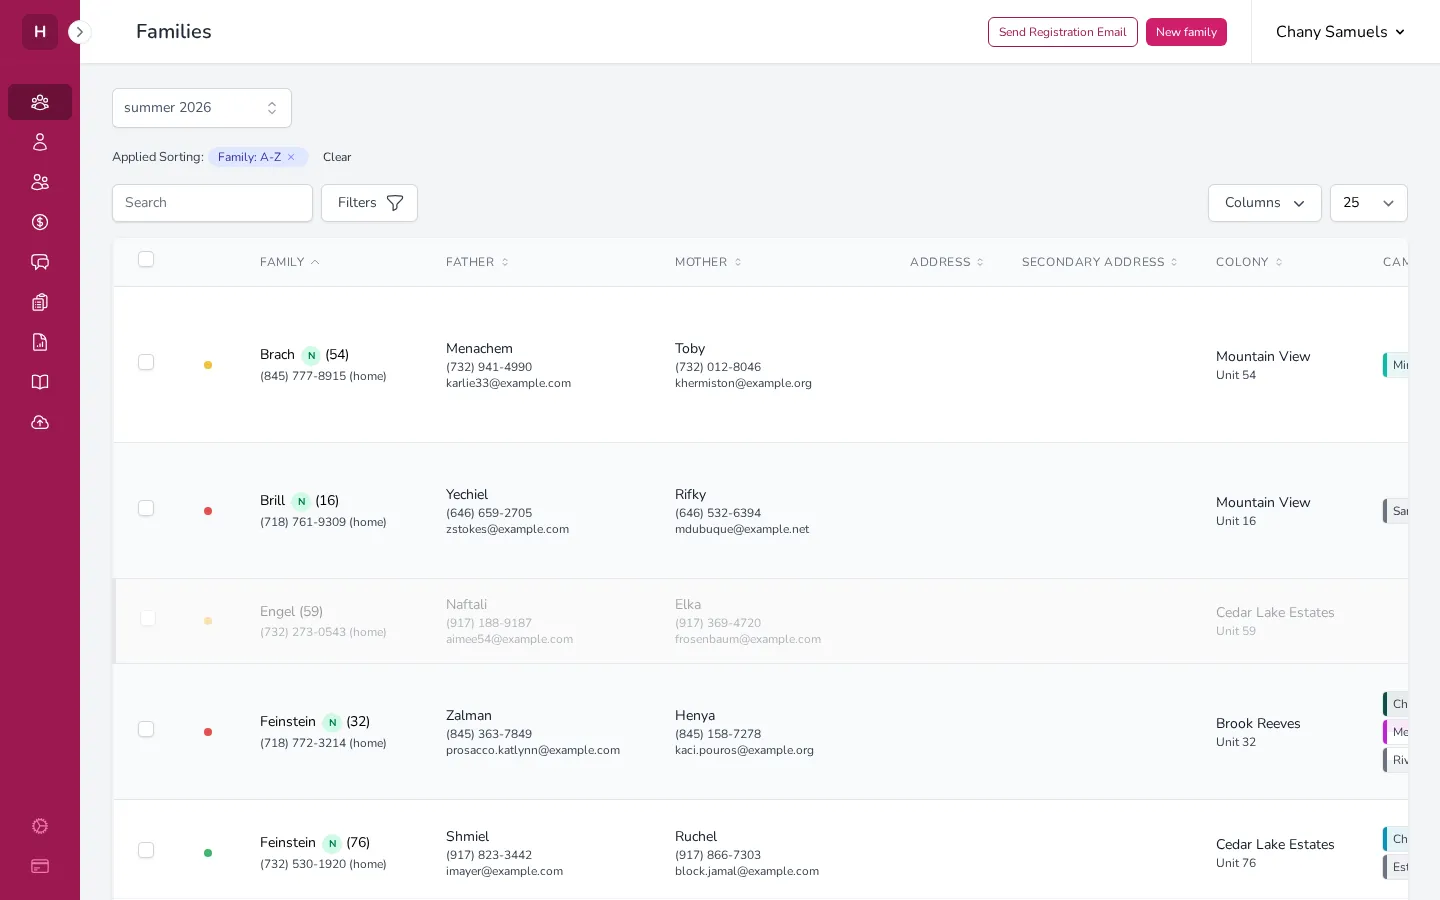
When the sidebar is collapsed, hover over any icon to see a label. For items with sub-pages, hovering will show a small pop-out menu with the options.
The Top Bar
Section titled “The Top Bar”The top bar runs across the top of every page. It shows:
- The page title — So you always know where you are (for example, “Families” or “Camp Settings”).
- Action buttons — Page-specific buttons appear here (like New family on the Families page).
- Your name — In the top-right corner. Click it to open a menu where you can log out.

The Season Picker
Section titled “The Season Picker”Just below the top bar, on every page, you’ll see a dropdown that shows the current season (for example, “summer 2026”). This controls which season’s data is displayed on the page.
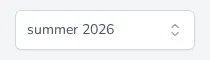
If you have multiple seasons, you can switch between them by clicking this dropdown and selecting a different season. See Switching Seasons for more details on how this works.
On Mobile
Section titled “On Mobile”On smaller screens (phones and tablets), the sidebar is hidden to save space. Tap the menu icon (three horizontal lines) in the top-left corner to open the sidebar as a slide-out panel. Tap any item to navigate, and the panel will close automatically.
Good to Know
Section titled “Good to Know”- The sidebar remembers whether you collapsed it, so it stays the way you left it when you come back.
- Some sidebar items may not appear if your account doesn’t have permission to access them. Ask your camp admin if you need access to a section you can’t see.
- You can always get back to the Families page by clicking Families in the sidebar — it’s your home base.