
Expenses & Budgets
The Financial page is where you track your camp’s spending. You can create budget categories, record expenses, and see at a glance how actual spending compares to what you planned. Open it from the Financial link in the sidebar.
Budget Overview
Section titled “Budget Overview”At the top of the page, three summary tiles give you a quick financial snapshot:
- Income received — Total accepted payments for the season, with the total billed amount below.
- Spent so far — Total expenses recorded, with the budgeted amount below.
- Remaining balance — Income minus expenses, with a projected balance below.
These tiles update automatically as payments and expenses are recorded.
Budget Categories
Section titled “Budget Categories”The Budget tab is where you define how your camp’s money should be allocated. Each budget category has a name, a projected (budgeted) amount, and an optional note.
Creating a Budget Category
Section titled “Creating a Budget Category”- Go to the Financial page from the sidebar.
- Click the Budget tab (it is selected by default).
- Click Edit to enter edit mode.
- Click Add Category.
- Enter the category name (for example, “Food & Catering”, “Staff Salaries”, “Transportation”).
- Enter the projected amount — how much you expect to spend in this category.
- Optionally add a note with details about the budget.
- Click Save.
Editing a Budget Category
Section titled “Editing a Budget Category”- Click Edit to enter edit mode.
- Click the edit icon next to the category you want to change.
- Update the name, projected amount, or note.
- Click Save.
Deleting a Budget Category
Section titled “Deleting a Budget Category”- Click Edit to enter edit mode.
- Click the delete icon next to the category.
- Confirm the deletion.
Deleting a category does not delete the transactions in it — they become uncategorized and can be reassigned to a different category.
Transactions (Expenses)
Section titled “Transactions (Expenses)”The Transactions tab shows all recorded expenses for the season. Each transaction has:
- Date — When the expense occurred.
- Description — What the expense was for.
- Vendor — Who you paid.
- Category — Which budget category the expense falls under.
- By — Who made the purchase.
- Amount — How much was spent. Expenses appear as negative amounts in red, income appears as positive amounts in green, and refunds appear in gray with a link to the original expense.
- Method — How the expense was paid (check, credit card, cash, etc.).
- Note — Optional additional details.
- Receipt — A paper-clip icon appears when a receipt is attached. Click it to view the file.
Adding a Transaction
Section titled “Adding a Transaction”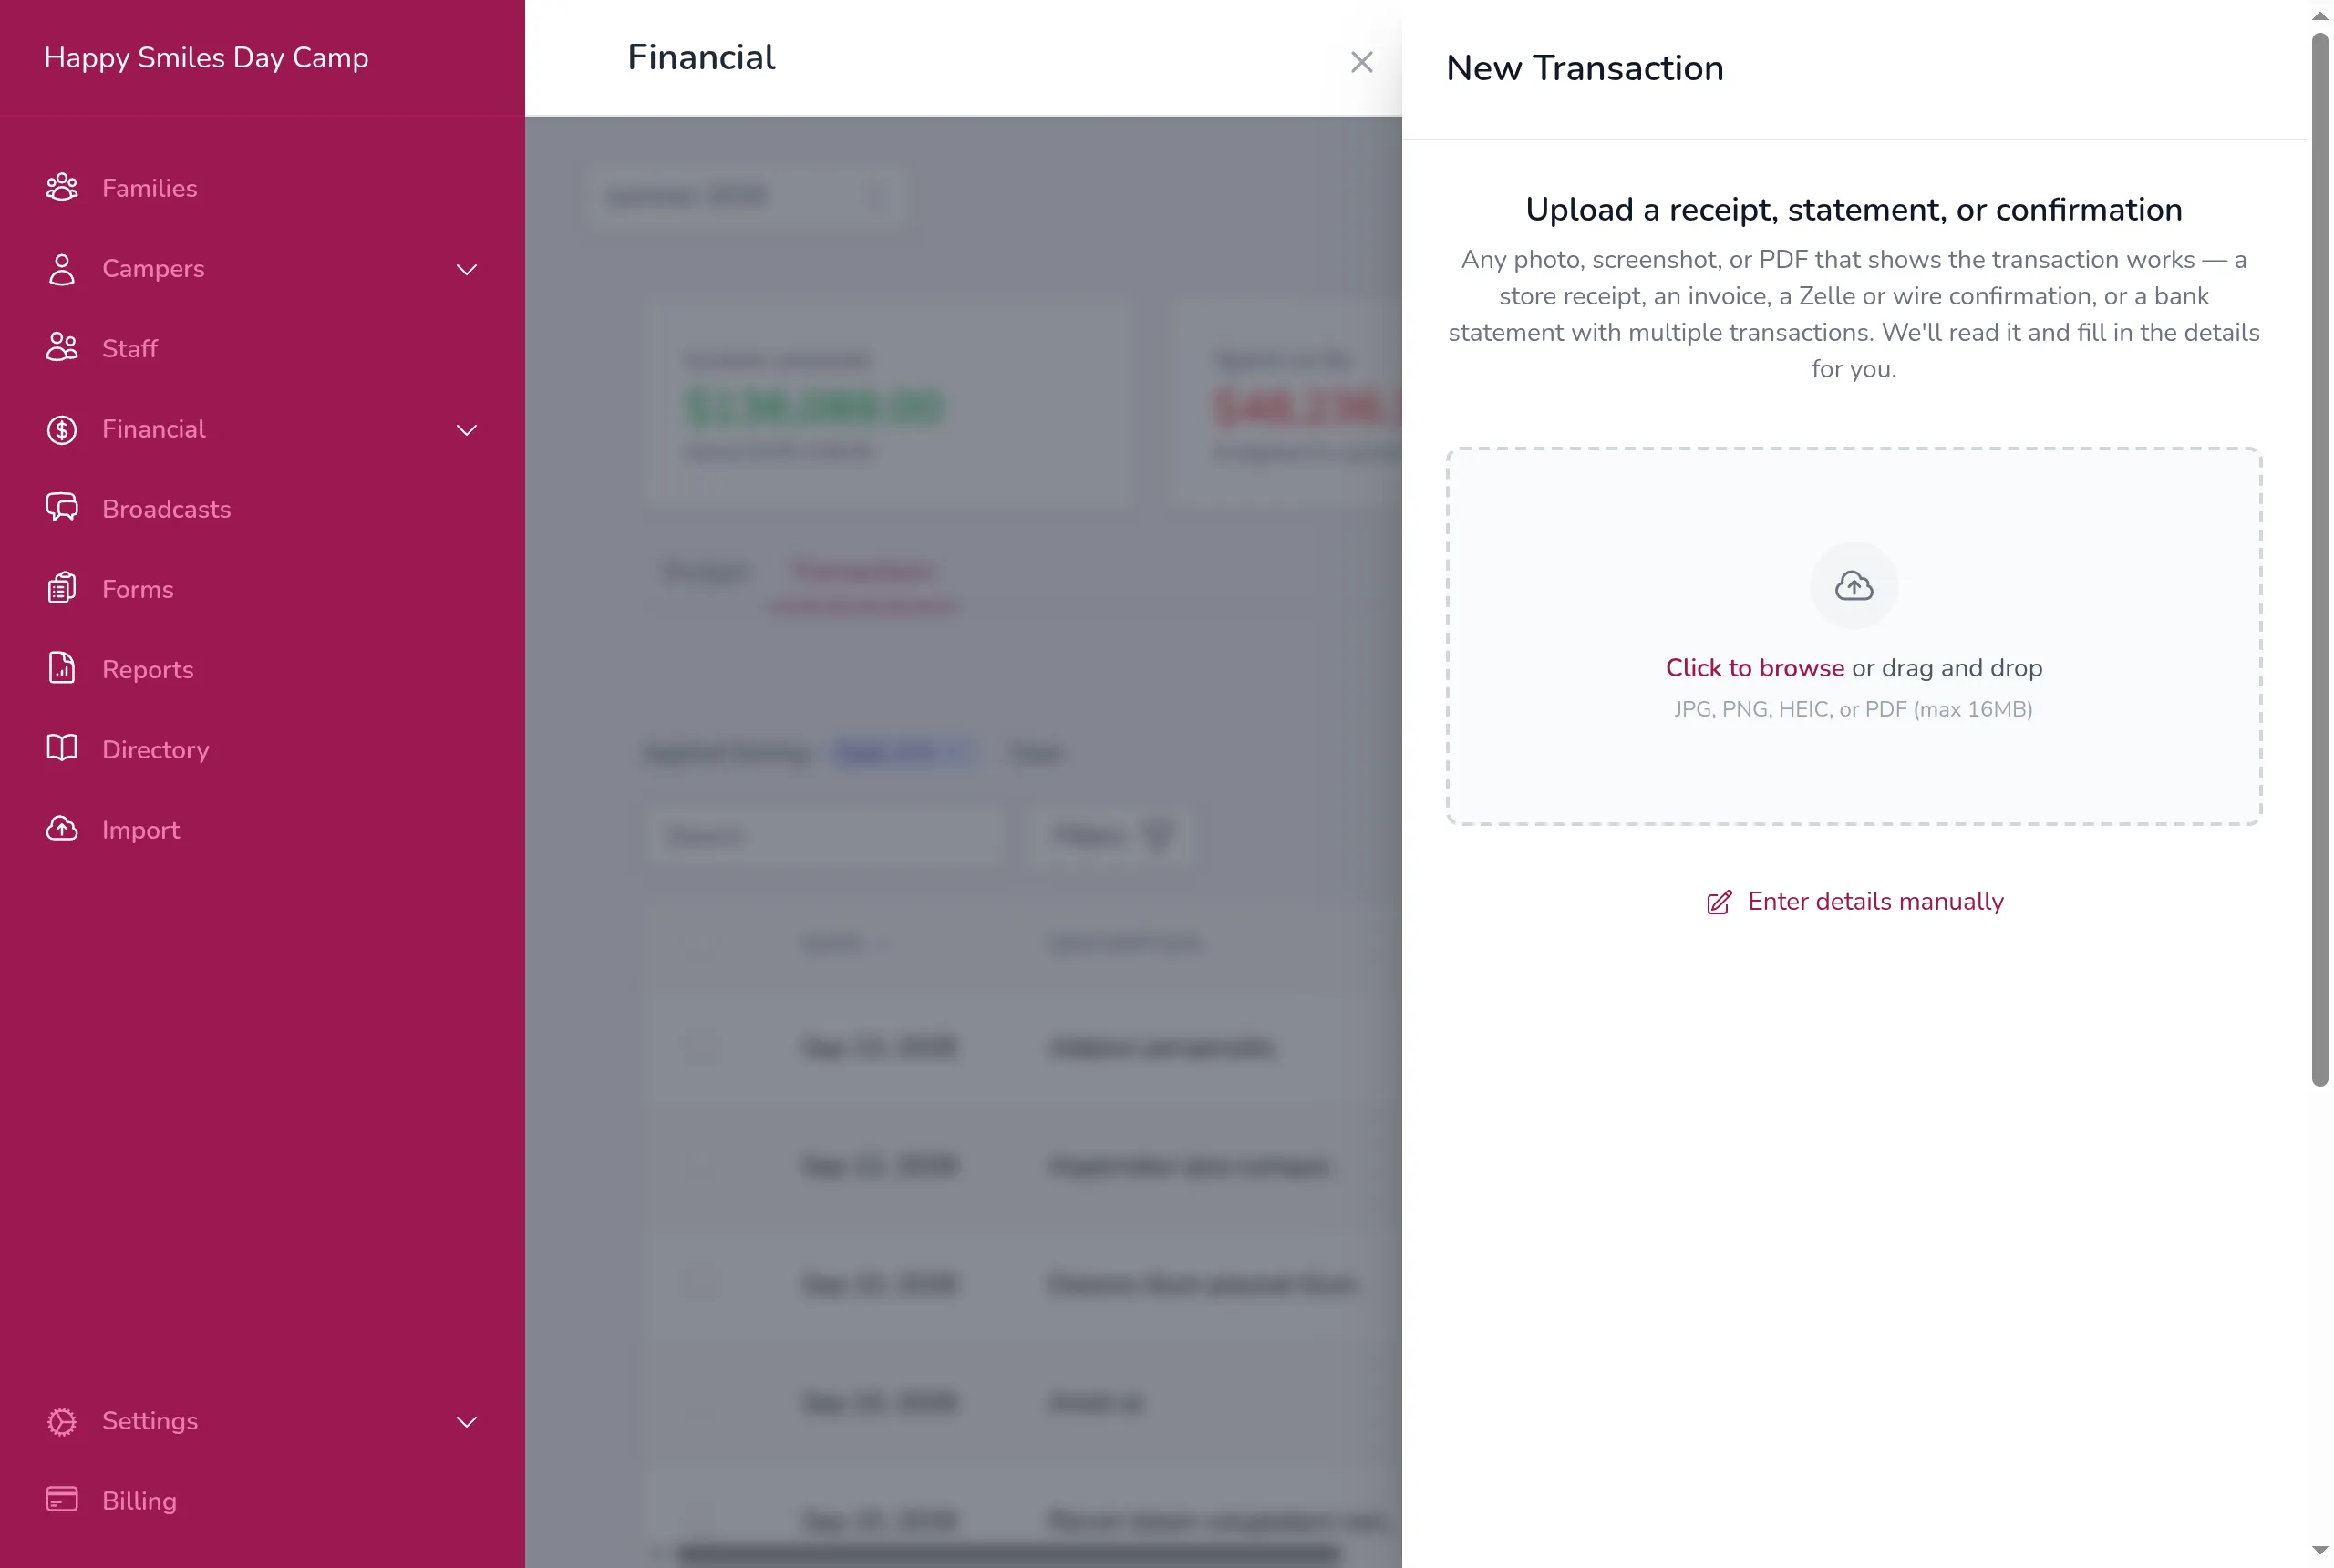
- Go to the Financial page and click the Transactions tab.
- Click Add Transaction.
- Upload any file that shows the transaction — a store receipt, an invoice, a Zelle or wire confirmation, or a bank statement. Click the upload area to browse for the file, or drag and drop it (JPG, PNG, HEIC, or PDF, up to 16MB). On a phone, you can take a photo of a paper receipt. Campflow reads the file and fills in the date, vendor, description, amount, and category for you. If you would rather type everything yourself, click Enter details manually.
- Review the form and correct anything that was misread — reading is not always perfect, so double-check the amount before saving.
- At the top of the form, choose Expense or Income. Use Income for money received that is not a refund (like trip fees collected or grants). To record a vendor refund, see Recording a Refund below. Do not try to use a negative amount — the minus sign is ignored. Use the toggle instead.
- Fill in anything that is missing: method, who made the purchase, and any notes.
- Click Save.
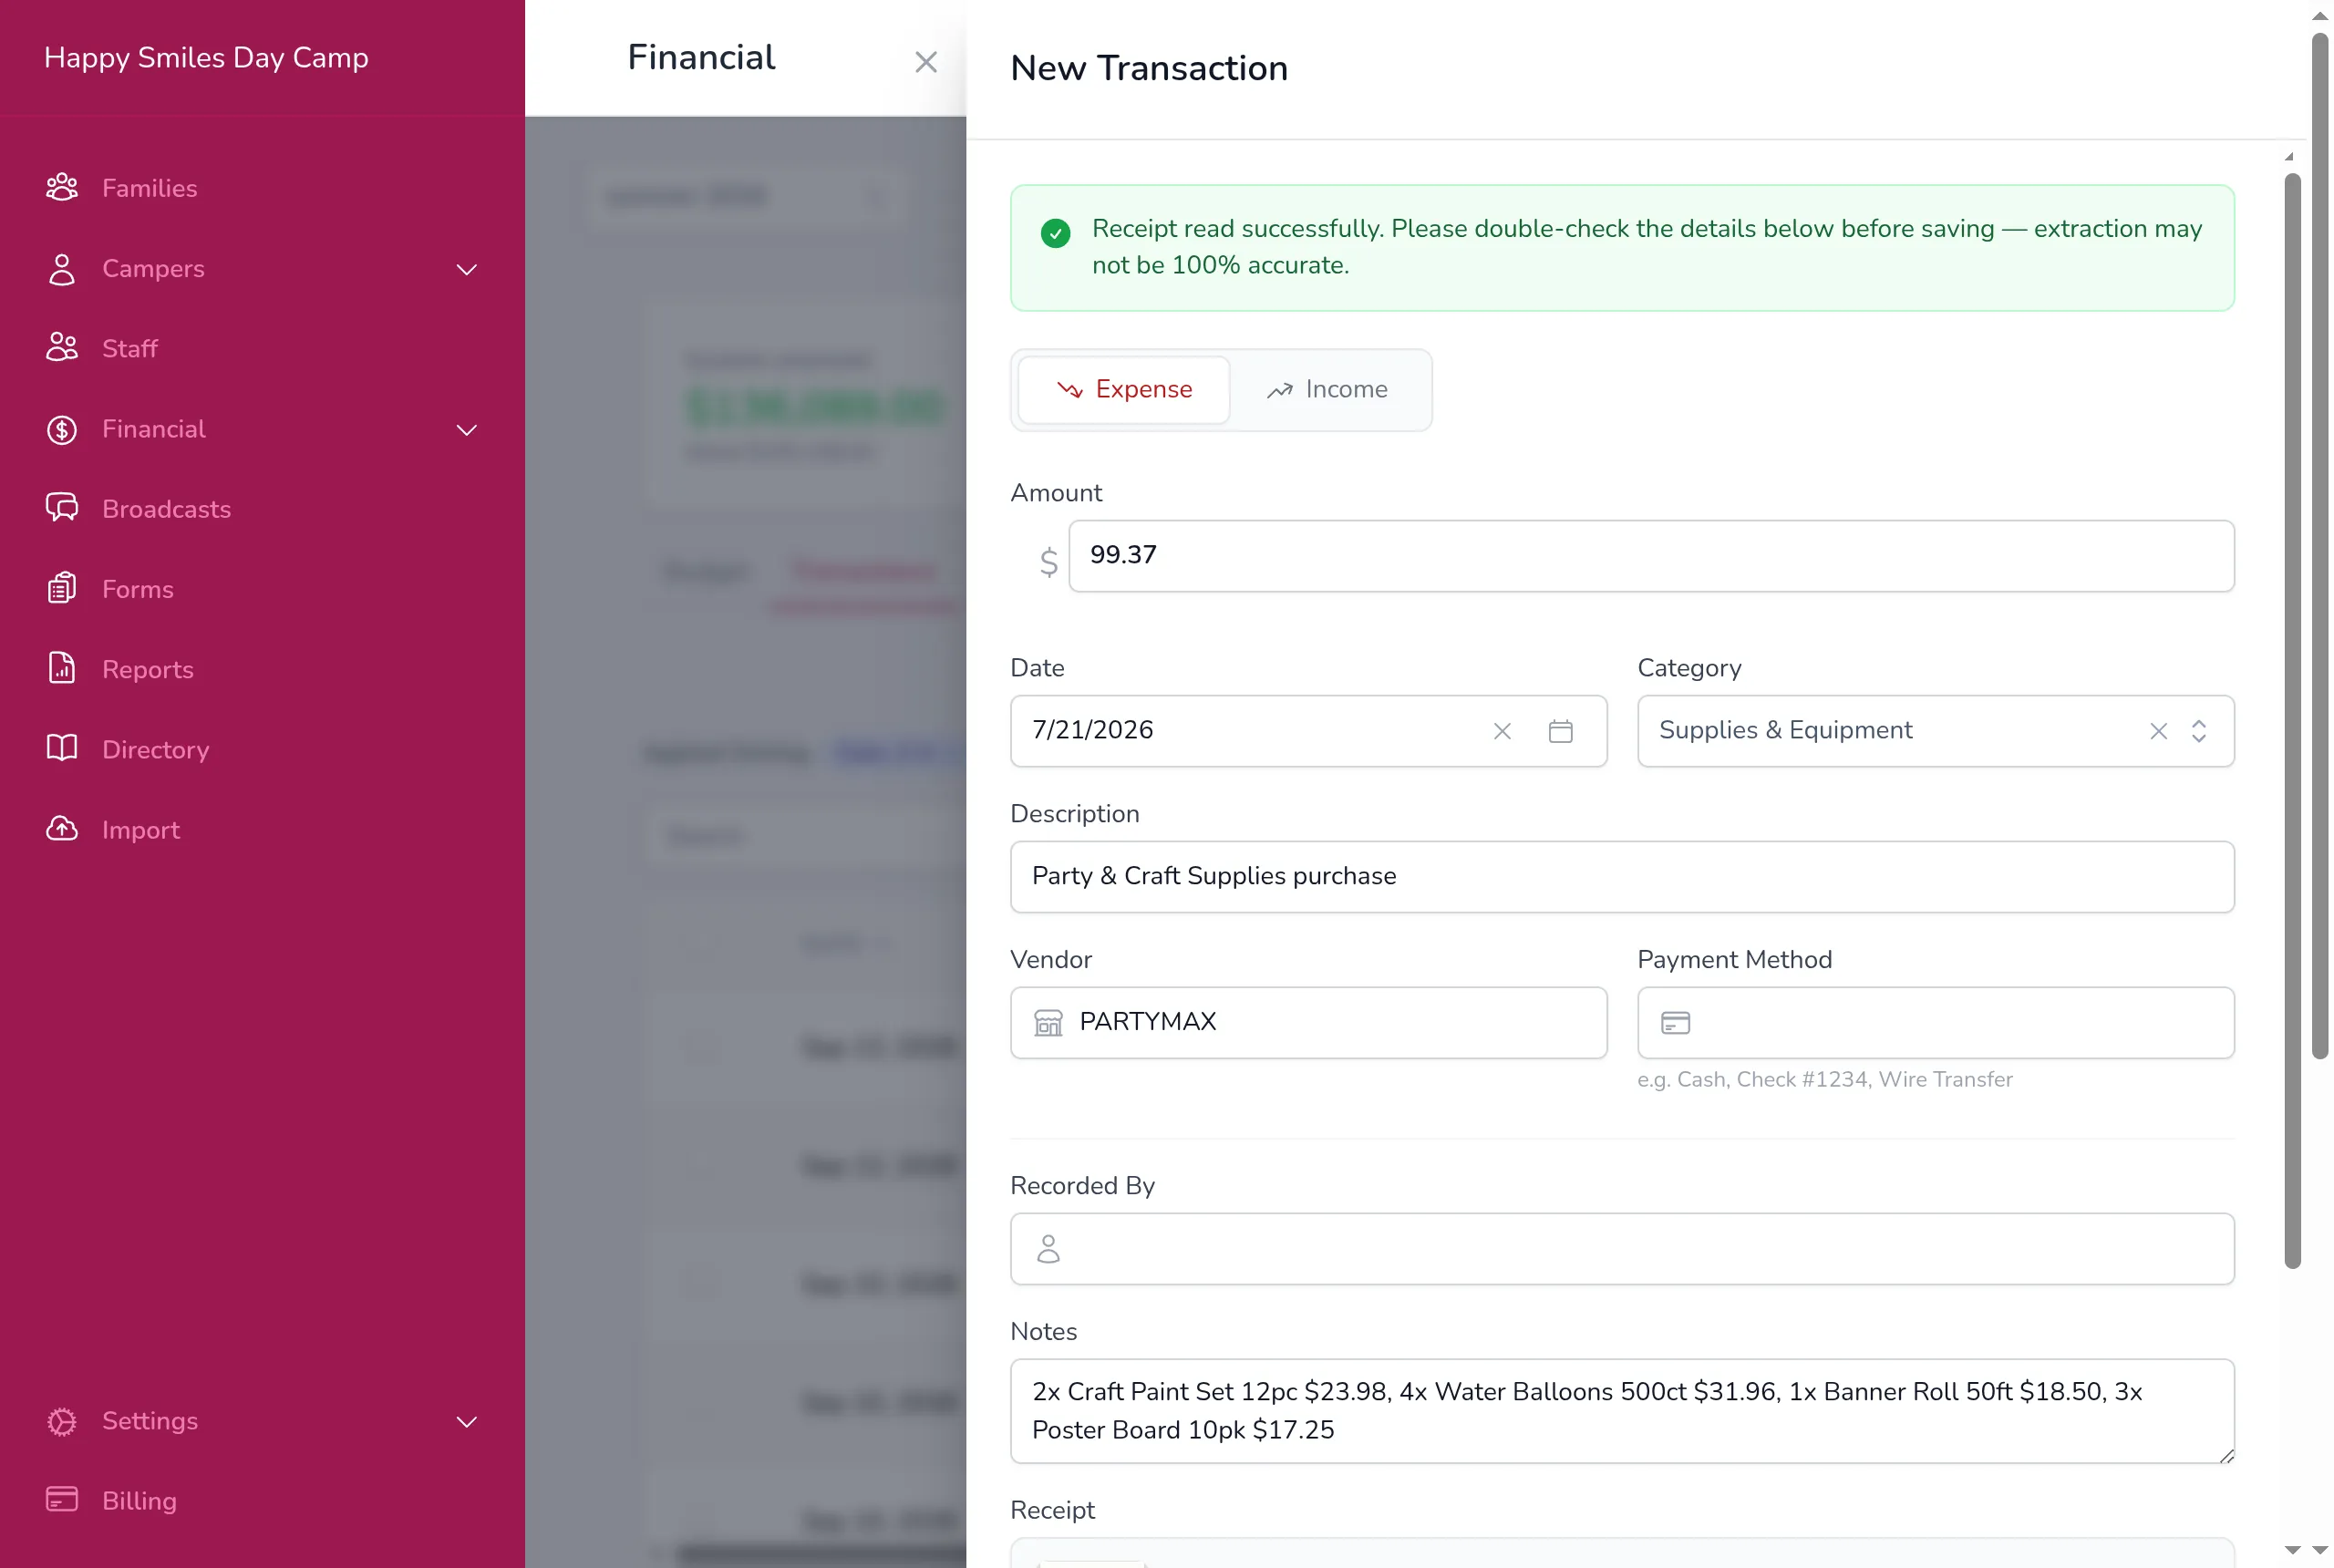
The uploaded file is saved with the transaction as its receipt. If the receipt shows individual line items, Campflow lists them in the Note field so you can see what was purchased without opening the file.
Uploading a Bank Statement
Section titled “Uploading a Bank Statement”If your file contains more than one transaction — a bank or credit card statement, for example — Campflow finds all of them and shows a review list instead of the regular form. Each row is pre-filled with the date, description, vendor, amount, category, and whether it is an expense or income (deposits are marked as income automatically).
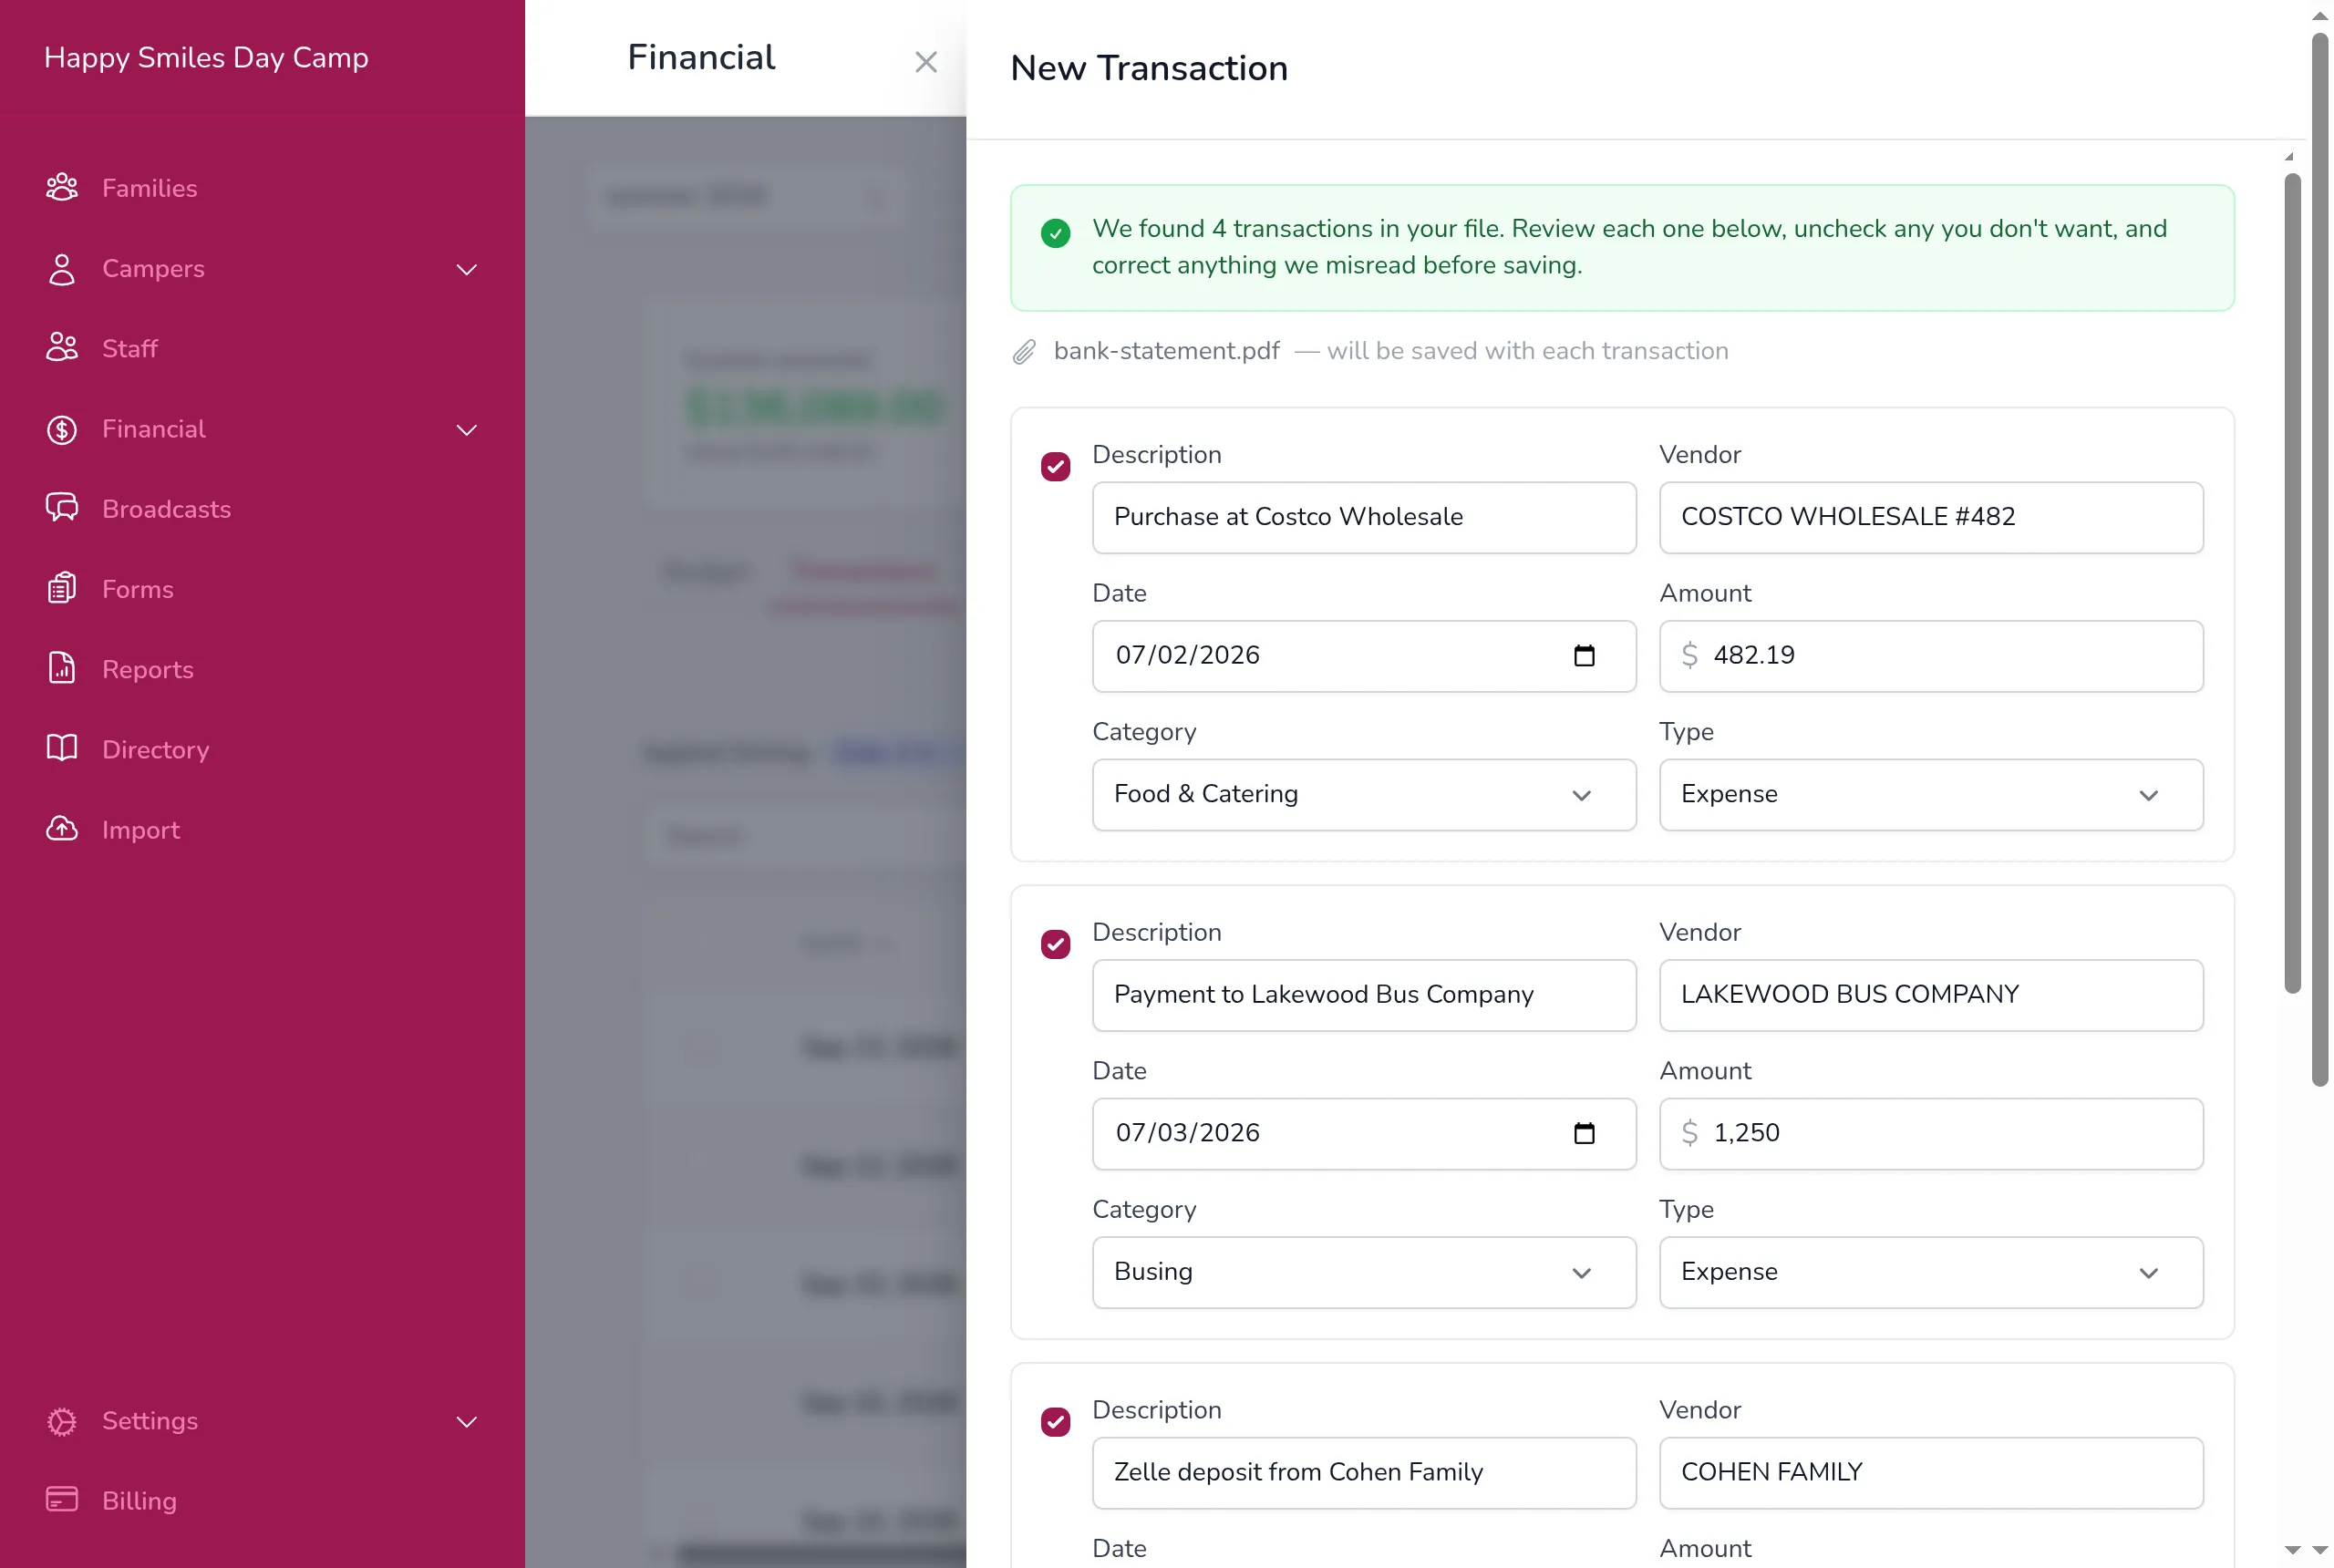
- Uncheck any transactions you do not want to record.
- Correct anything that was misread, and select a category for each transaction.
- Click Save Transactions (the button shows how many are checked).
Every transaction saved this way links back to the uploaded statement as its receipt.
To record the checked transactions as a single expense instead — for example, a credit card statement you want to book as one total — click Combine Into One. The regular form opens with the total amount filled in so you can review it before saving. Deposits in the selection are subtracted from the total, and the Note field lists each combined transaction so the total stays traceable.
Editing a Transaction
Section titled “Editing a Transaction”- Find the transaction in the table.
- Click the edit icon on the row.
- Make your changes. The attached receipt appears at the bottom of the form — click the preview to see it full size, or upload a new file to replace it.
- Click Save.
Deleting a Transaction
Section titled “Deleting a Transaction”- Find the transaction in the table.
- Click the delete icon.
- Confirm the deletion.
Recording a Refund
Section titled “Recording a Refund”If a vendor returned money for an expense you already recorded, you can record a refund directly against that expense. Refunds reduce the Spent so far tile — they do not add to income.
- Find the original expense in the transactions table.
- Click the refund button on the expense row.
- The refund form opens with the category, vendor, and description pre-filled from the original expense. Adjust them if needed.
- Enter the refund amount. The form shows the remaining expense balance for reference. You can enter any amount — if the refund exceeds the balance, a note will confirm the amount will be recorded as entered.
- Click Record Refund.
You can record multiple partial refunds against the same expense. Each refund appears as its own row in the table with a “Refund for: {description}” label, and the original expense shows the total amount refunded underneath it.
Filtering and Exporting
Section titled “Filtering and Exporting”You can filter the transactions table by:
- Category — Show only expenses in a specific budget category.
- By — Show only expenses made by a specific person.
- Type — Show only expenses, income, or refunds.
- Method — Show only expenses paid by a specific method.
To export transactions, select the ones you want using the checkboxes and click Export. They download as an Excel spreadsheet.
Importing Expenses
Section titled “Importing Expenses”If you track expenses in a separate spreadsheet, you can import them into Campflow:
- Go to the Financial page.
- Click Import (if available).
- Upload your spreadsheet file.
- Map the columns to Campflow fields (date, description, vendor, amount, etc.).
- Review the import and confirm.
Good to Know
Section titled “Good to Know”- Budget categories and transactions are specific to each season. When you switch seasons, you will see the budget and transactions for that season.
- The summary tiles at the top combine income data (from the Income page) with expense data to give you a complete financial picture.
- Refunds and income are different. A vendor refund should be recorded using the refund button on the original expense — it reduces the Spent so far tile. The Income toggle on the Add Transaction form is for non-refund income (grants, trip fees, etc.) and adds to the Income received tile instead.
- If Campflow cannot read details from an uploaded file, the file is still attached to the transaction — enter the details yourself.
- If you attach a receipt after entering details yourself, Campflow checks the receipt against what you typed. Empty fields are filled in for you, and if the amount or date differs from the receipt, Campflow asks which version to keep.
- You can use the search bar in the transactions table to find expenses by description, vendor, or note.
- The transactions table shows a running total at the bottom of the amount column so you can see total spending at a glance.