
Bunk Assignments
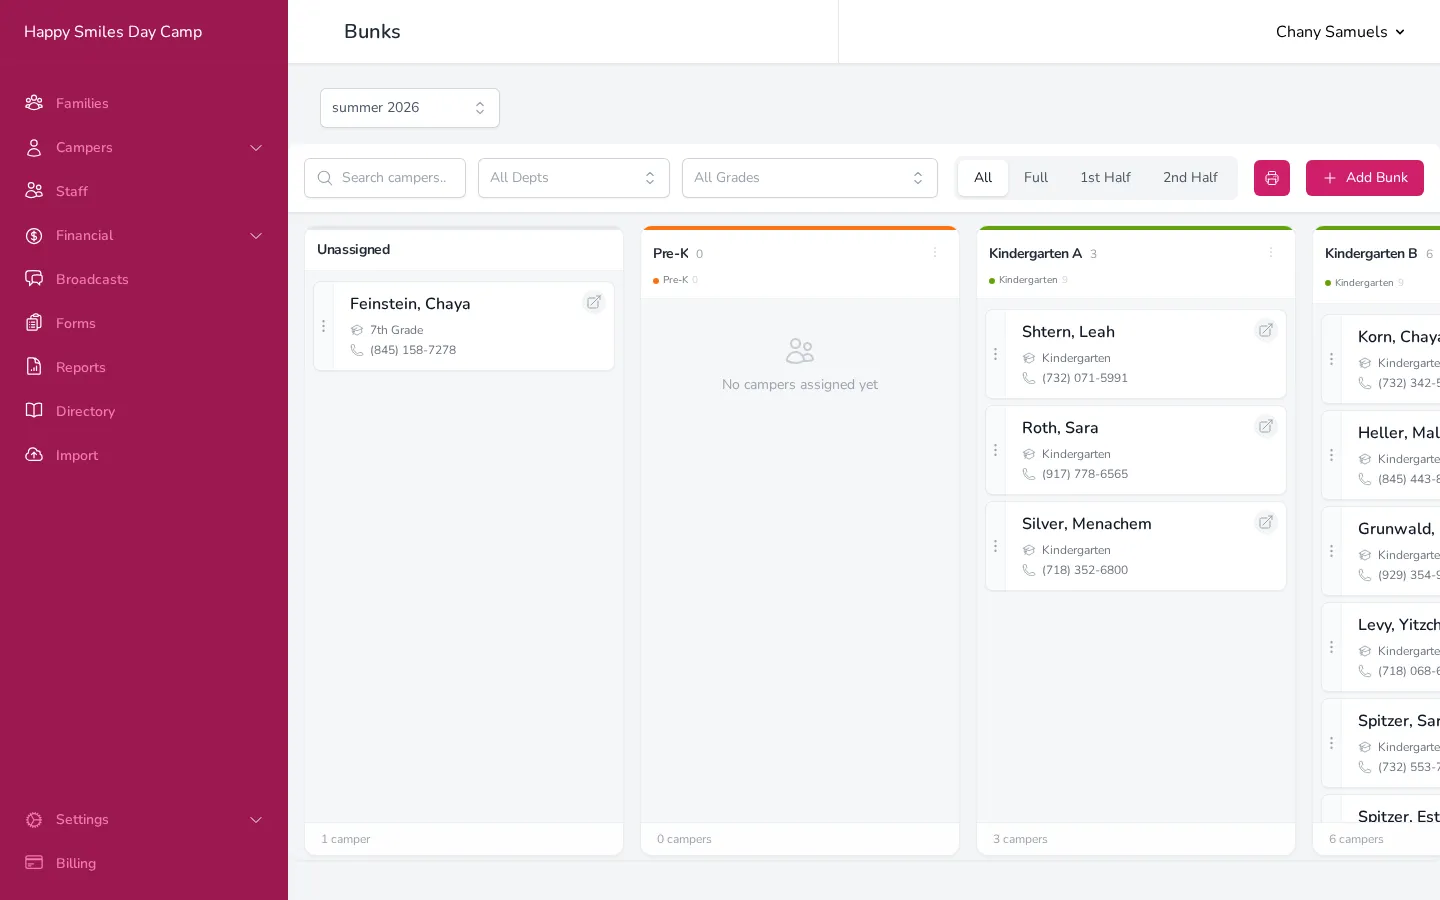
The Bunks page is where you organize campers into bunks. It works like a board with columns — each bunk is a column, and camper cards can be dragged between them. Unassigned campers appear in a column on the left so you can see who still needs a spot.
Creating a Bunk
Section titled “Creating a Bunk”- Go to the Bunks page from the sidebar (under Campers).
- Click Add Bunk in the top right.
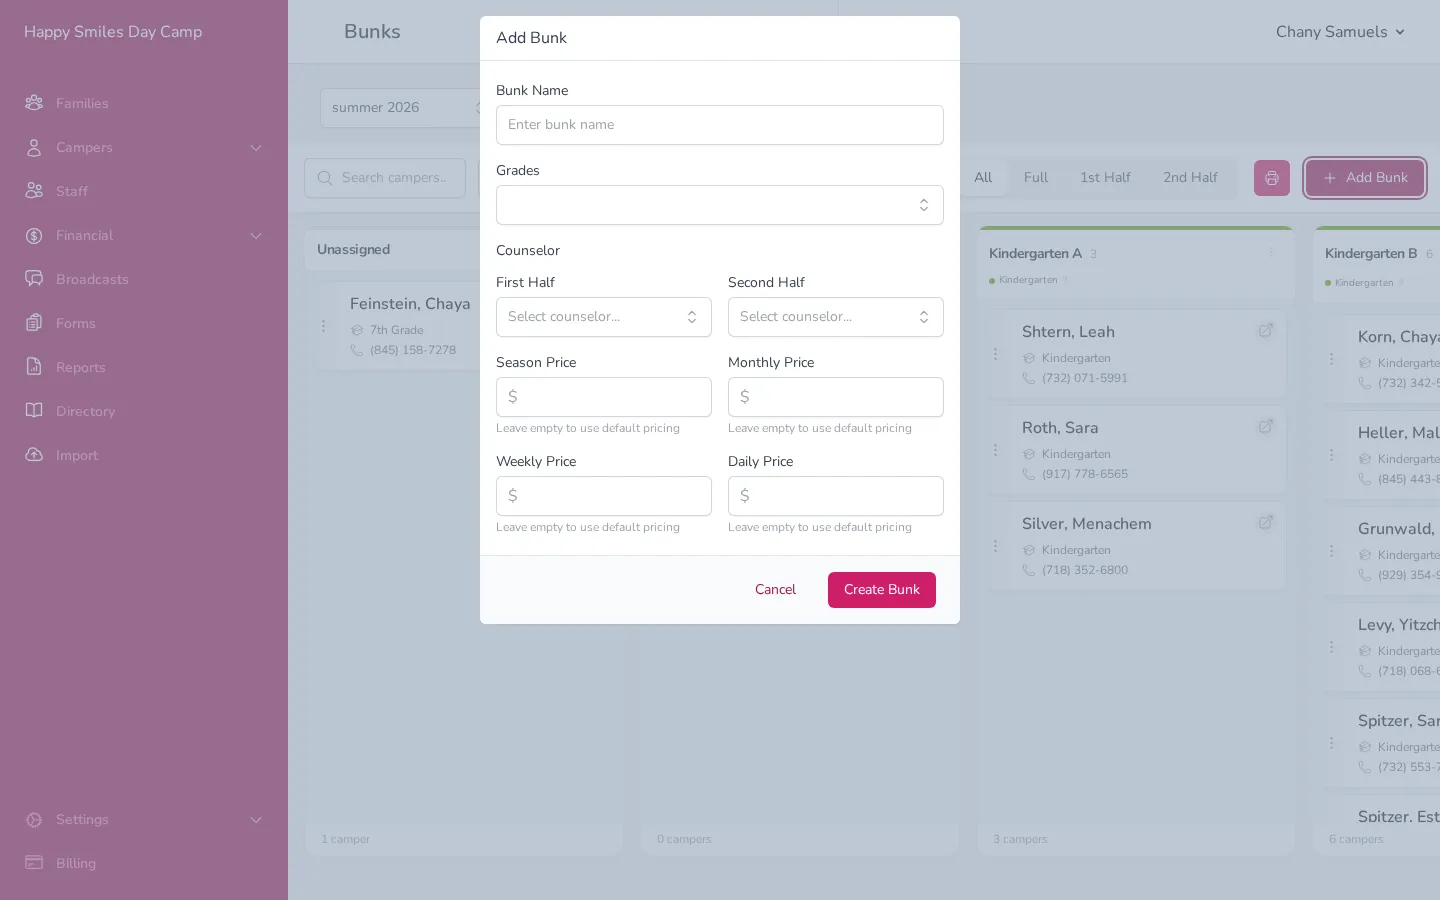
- Enter a Bunk Name (e.g., “Bunk Aleph” or “Boys Cabin 3”).
- Select the Grades that belong to this bunk. You can select more than one grade — for example, if 1st and 2nd graders share a bunk.
- Optionally, assign Counselors for each half of the summer. Select staff members from the First Half and Second Half lists. If a counselor is selected for both halves, they’ll be marked as full-season automatically.
- Optionally, set custom pricing for this bunk. If you leave the price fields empty, the default season pricing will be used. Fill in a price to override the default for campers in this bunk.
- Click Create Bunk.
Assigning Campers to Bunks
Section titled “Assigning Campers to Bunks”Once you have bunks set up, you can assign campers by dragging their cards from one column to another.
- Find the camper you want to assign. They’ll be in the Unassigned column on the far left, or in another bunk if you’re moving them.
- Click and hold the camper’s card.
- Drag it to the bunk column you want to place them in.
- Release the card to drop it in.
The camper count in each bunk header updates automatically. You can also reorder campers within a bunk by dragging them up or down.
Each camper card shows their name, grade, school, and parent phone number so you can make informed decisions while assigning bunks. If a camper has bunk preferences, a green star icon appears on the card — hover over it to see who they requested.
Filtering and Searching
Section titled “Filtering and Searching”The filter bar at the top of the Bunks page helps you focus on specific groups of campers.
- Search — Type a camper name, family name, phone number, or city to quickly find someone across all bunks.
- Department — Filter to show only bunks and campers from a specific department (e.g., “Elementary Division”).
- Grades — Select one or more grades to narrow the view. Only bunks containing those grades will appear.
- Term tabs — Switch between All, Full, 1st Half, and 2nd Half to filter campers by enrollment term. Full shows only full-summer campers. 1st Half and 2nd Half show campers enrolled for that half plus full-summer campers, since full-summer campers are present during both halves. Counselor assignments follow the same logic — full-season counselors appear regardless of which half is selected.
Sorting Campers
Section titled “Sorting Campers”You can sort campers within every bunk at once to get an organized starting point before fine-tuning with drag and drop.
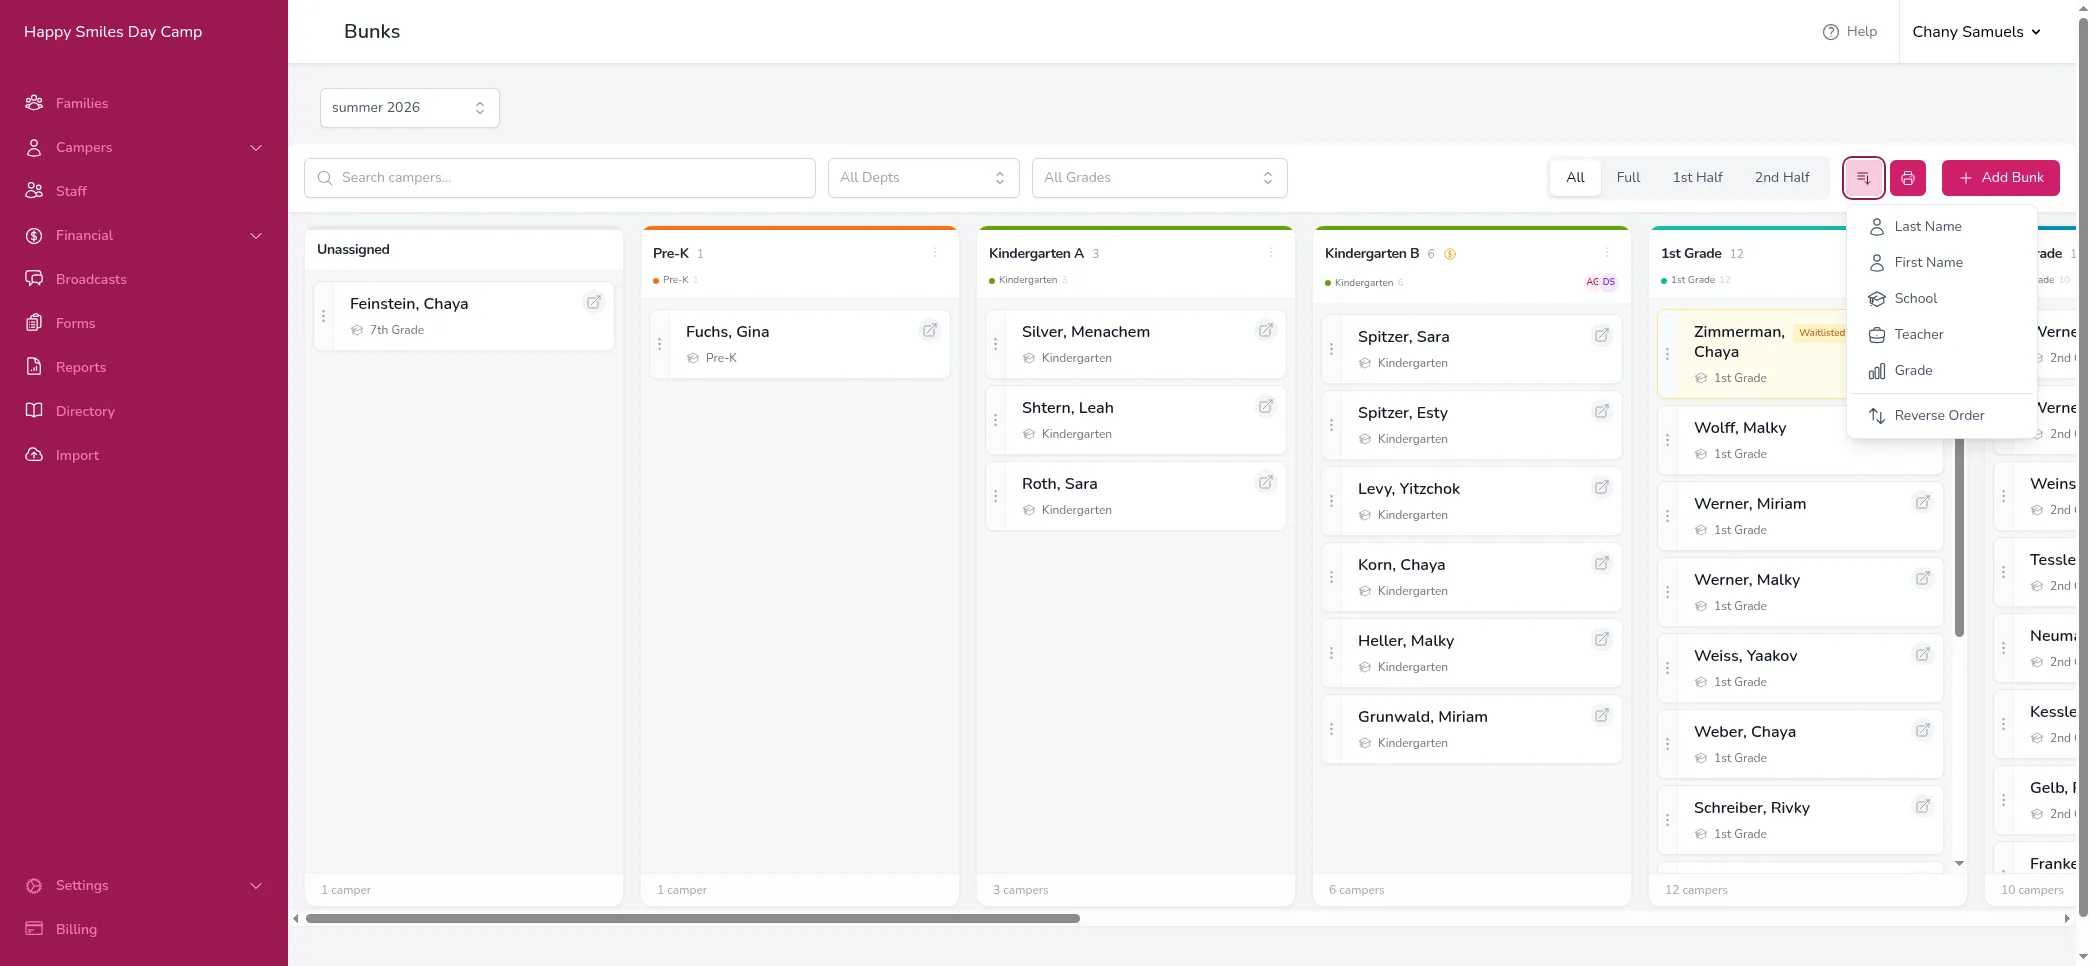
- Click the sort button in the top-right corner of the page, next to the print button.
- Select a sort option: Last Name, First Name, School, Teacher, or Grade.
- Confirm the sort. Campers in every bunk will be reordered based on your selection.
After sorting, you can still drag campers to adjust positions within a bunk. The sort sets a new starting order — it does not lock anything in place.
To flip the current order (e.g., switch from A-Z to Z-A), open the sort menu again and select Reverse Order.
Editing a Bunk
Section titled “Editing a Bunk”- Click the three-dot menu (the small icon in the top-right corner of any bunk column).
- Select Edit.
- Update the bunk name, grades, counselors, or pricing as needed.
- Click Save Changes.
Deleting a Bunk
Section titled “Deleting a Bunk”- Click the three-dot menu on the bunk column header.
- Select Delete.
- Confirm the deletion. Campers in that bunk will become unassigned — they won’t be deleted, just moved back to the Unassigned column.
Printing Bunk Rosters
Section titled “Printing Bunk Rosters”You can print rosters for individual bunks or for all bunks at once. Both options open the Print & Export panel, where you can choose a format (contact list, labels, admission cards, or Excel), select the fields you want, and generate the output.
- To print a single bunk, click the three-dot menu on the bunk column and select Print.
- To print all bunks, click the print button (the printer icon) in the top-right corner of the page next to the Add Bunk button.
Understanding the Bunk Header
Section titled “Understanding the Bunk Header”Each bunk column header shows useful information at a glance:
- Bunk name and the number of campers currently assigned
- Grade color bar across the top — a colored stripe showing which grades are represented and their proportions
- Grade names with individual counts (e.g., “Kindergarten 3” means three kindergartners in this bunk)
- Counselor initials — small colored circles showing which staff members are assigned as counselors
- Dollar sign icon — appears if the bunk has custom pricing that differs from the default season pricing
Good to Know
Section titled “Good to Know”- Campers with a rejected approval status cannot be assigned to a bunk. You’ll need to change their approval status to an approved status first.
- Bunks are tied to the current season. When you create a new season, you’ll need to set up bunks again.
- When a camper registers, Campflow automatically creates a bunk for their grade if one doesn’t already exist. You can rename or reorganize these auto-created bunks at any time.
- The bunk board scrolls horizontally — if you have many bunks, scroll right to see them all.