
Colonies
Colonies let you group families by location — typically bungalow colonies or neighborhoods. This is useful if your camp serves families from different areas and you need to track where they are coming from, assign local contacts, or charge different prices based on location.
Adding a Colony
Section titled “Adding a Colony”Colonies are managed in the Colonies section of the Settings page.
- Click Settings in the sidebar.
- Scroll down to the Colonies section.
- Click Add Colony (or Add Another Colony if you already have colonies).
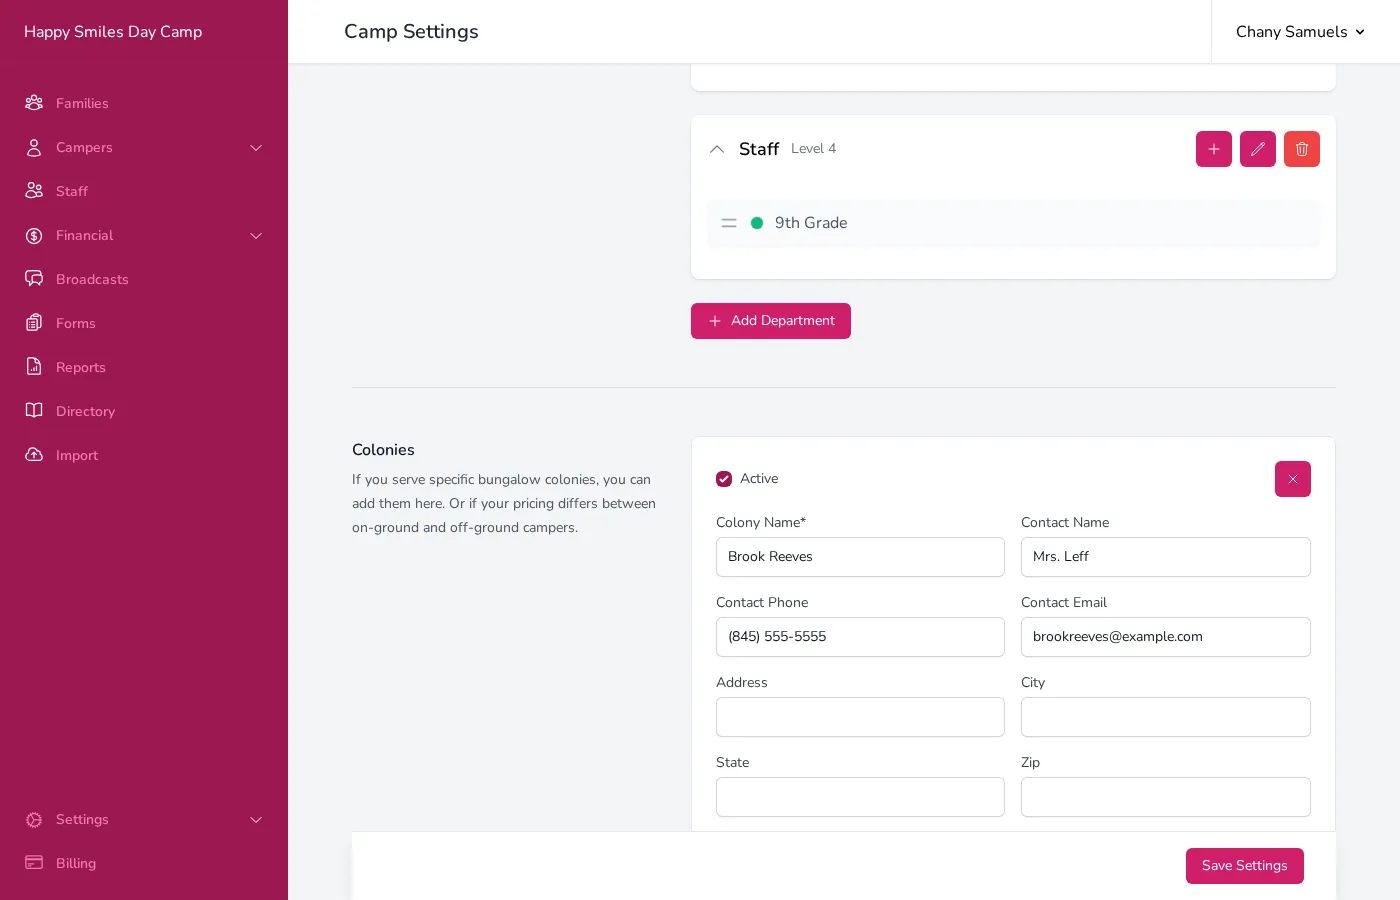
- Enter the Colony Name (e.g., “Brook Reeves” or “Pine Valley”).
- Optionally fill in the contact and address information:
- Contact Name — The local representative for this colony.
- Contact Phone and Contact Email — How to reach the local contact.
- Address, City, State, Zip — The colony’s location.
- Click Save Settings.
Price Adjustments
Section titled “Price Adjustments”Each colony can have a price adjustment that automatically changes the tuition for families in that colony. This is useful if on-ground campers pay a different rate than off-ground campers, or if certain colonies receive a discount.
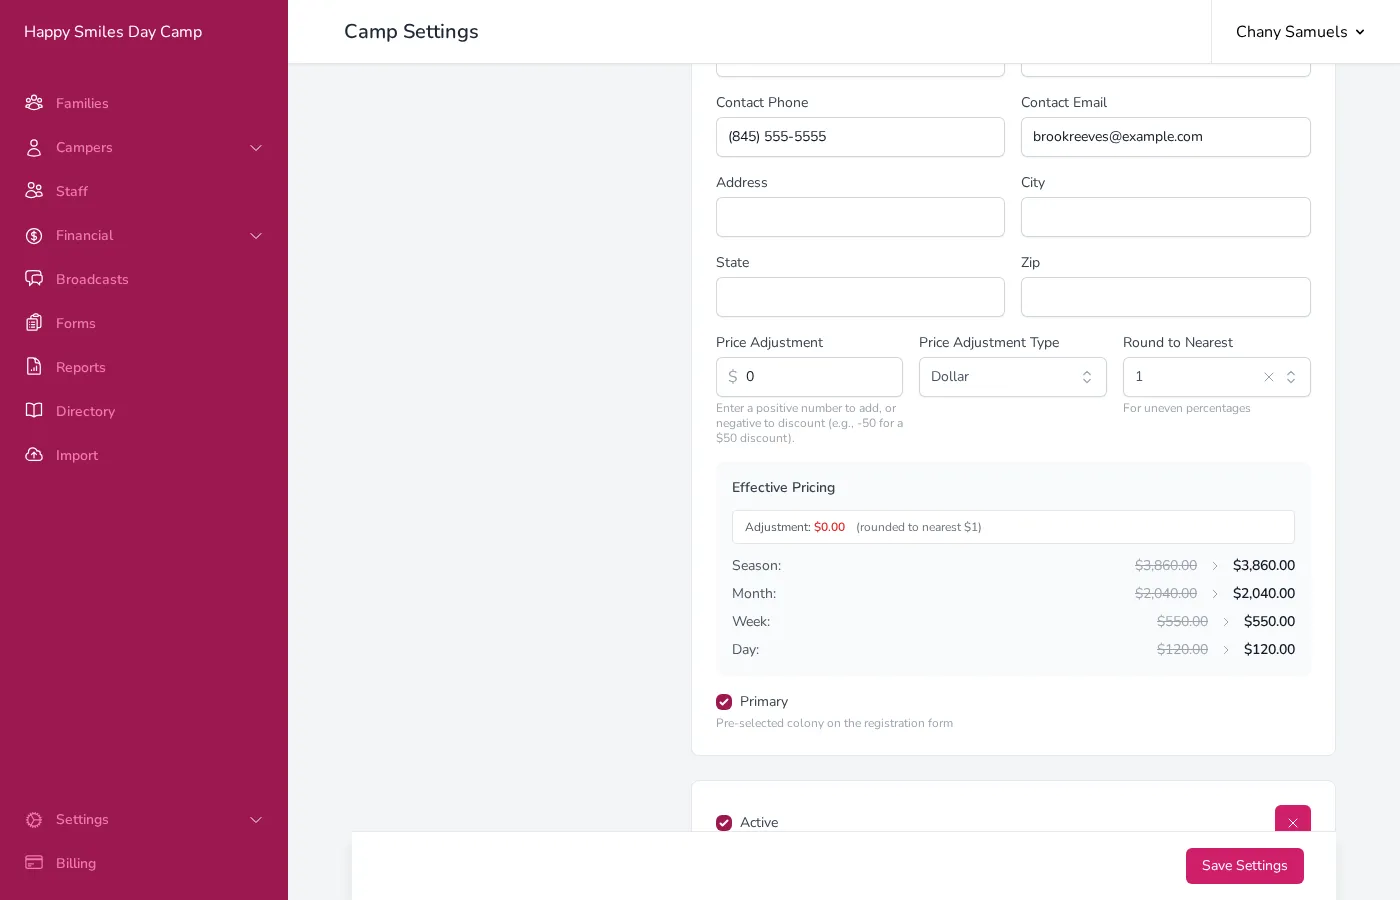
- In the colony card, find the Price Adjustment field.
- Enter the adjustment amount. Use a positive number to add to the price, or a negative number to subtract (e.g., -50 for a $50 discount).
- Choose the Price Adjustment Type:
- Dollar — The adjustment is a fixed dollar amount (e.g., +$100 or -$50).
- Percent — The adjustment is a percentage of the base price (e.g., +5% or -10%).
- If using a percentage, you can set Round to Nearest to round the adjusted price to the nearest $1, $5, $10, $25, $50, or $100. This avoids awkward amounts like $3,857.40.
When a price adjustment is set, Campflow shows an Effective Pricing preview below the colony card. This shows the original price crossed out next to the adjusted price for each term length, so you can verify the math before saving.
Primary Colony
Section titled “Primary Colony”If you have multiple colonies, one must be marked as the Primary colony. The primary colony is pre-selected on the registration form, so families from that location do not need to change it.
To set a colony as primary, check the Primary box at the bottom of the colony card. Only one colony can be primary at a time — selecting a new one will automatically deselect the previous one.
Active vs. Inactive
Section titled “Active vs. Inactive”Each colony has an Active checkbox at the top of its card. When unchecked, the colony is hidden from the registration form and other lists but its data is preserved. This is useful for colonies you no longer serve but want to keep on record.
Good to Know
Section titled “Good to Know”- Colonies are shared across all seasons. When a family is assigned to a colony, they keep that assignment from season to season.
- On the registration form, parents select their colony from a list. The primary colony is pre-selected.
- Colony price adjustments are applied to the base season pricing. They do not affect fees — only tuition.
- If you delete a colony that has families assigned to it, those families will keep their colony name on record but will no longer be linked to the managed colony. Their pricing will revert to the default.
- You can filter the family table by colony to see all families from a specific location.