
Building a Form
The form builder is where you design your form, configure how it behaves, and decide what information to collect. Every form has four tabs: Settings, Fields, Share, and Submissions.
Configuring Your Form
Section titled “Configuring Your Form”The Settings tab is where you set up the basics before adding fields.
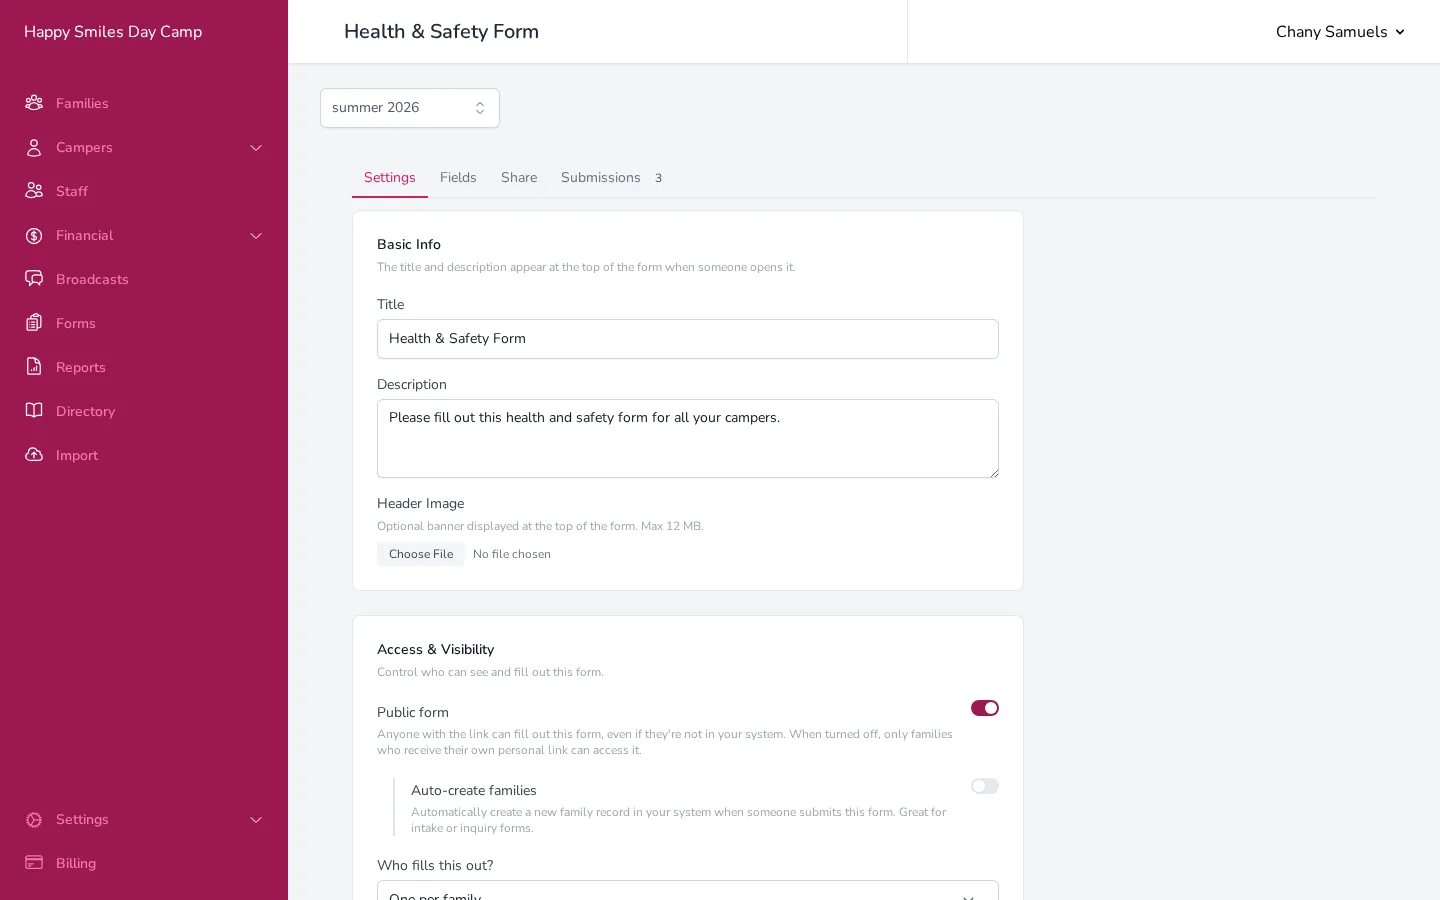
Basic Info
Section titled “Basic Info”- Open your form and click the Settings tab.
- Enter a Title — this is what families see at the top of the form.
- Add a Description if you want to provide context or instructions.
- Optionally upload a Header Image — a banner that appears at the top of the form. After uploading, you can adjust its size (Full, Large, Medium, Small) and position (Left, Center, Right).
Access & Visibility
Section titled “Access & Visibility”These settings control who can see and fill out the form.
- Public form — when turned on, anyone with the link can fill out the form, even people not in your system. When turned off, only families who receive a personalized link can access it.
- Auto-create families — only available for public forms. When turned on, a new family record is automatically created in your system when someone submits. This is useful for intake or inquiry forms where you want new families to appear in your Families page after submitting.
- Who fills this out? — choose between:
- Anyone (no family link) — the form isn’t connected to any family or camper. Use for general surveys or feedback.
- One per family — each family sees their own version of the form. If you add per-camper fields, those fields repeat for each enrolled camper in the family.
- Which campers to show — when the scope is set to “One per family,” you can filter which campers appear on the form by their approval status. Leave this empty to show all enrolled campers.
Submission Rules
Section titled “Submission Rules”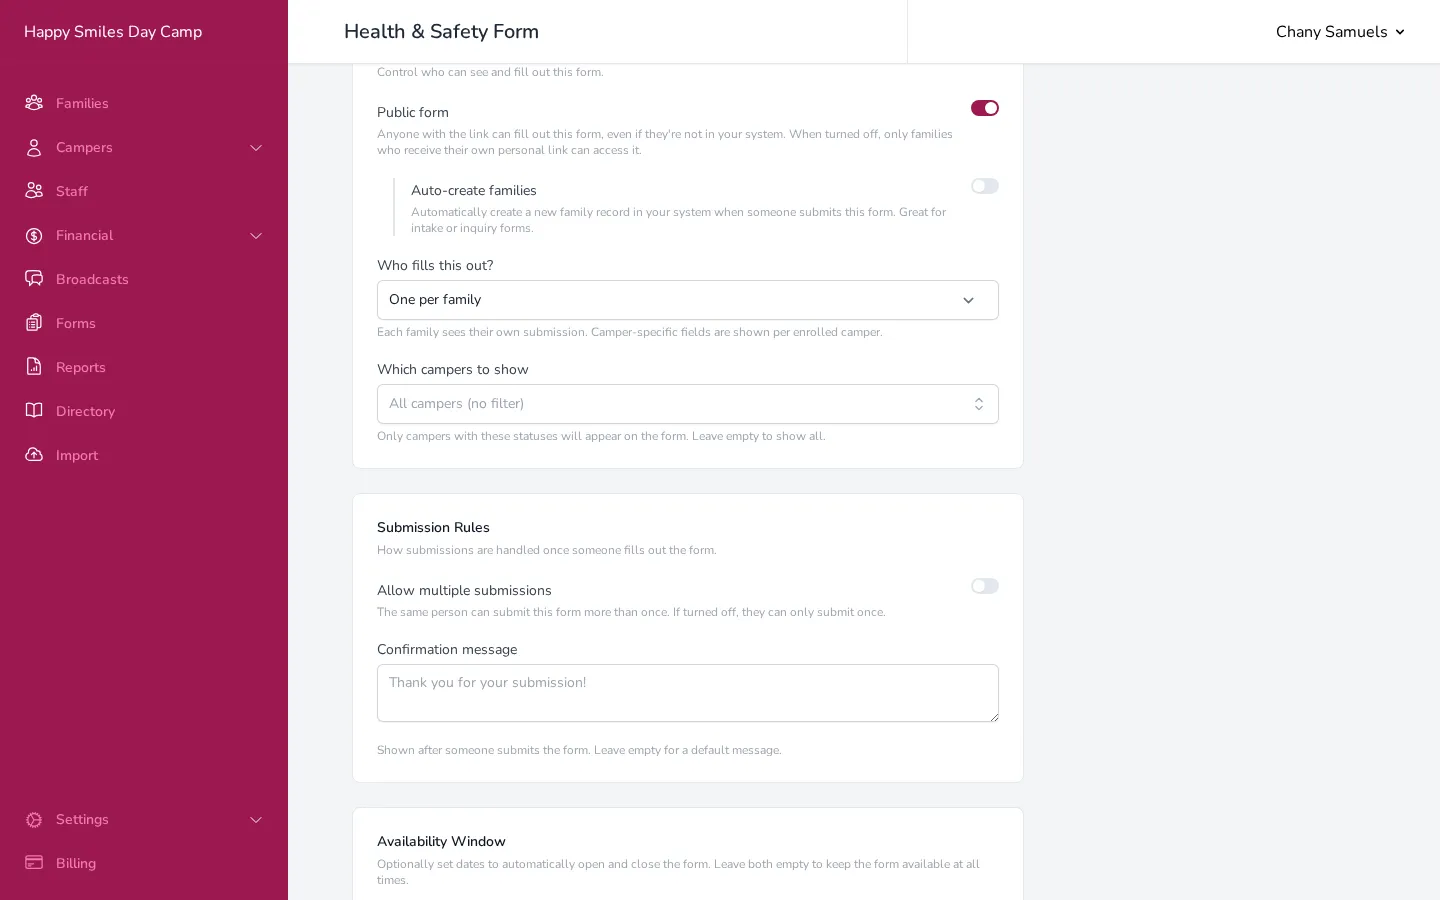
- Allow multiple submissions — when turned on, the same family can submit the form more than once. When turned off, they can only submit once.
- Confirmation message — a custom message shown after someone submits. Leave it empty to use the default “Thank you” message.
Availability Window
Section titled “Availability Window”Set dates to automatically open and close the form. This is useful for time-sensitive forms like trip permission slips.
- Opens — the form won’t accept responses before this date
- Closes — the form stops accepting responses after this date
Leave both empty to keep the form available whenever it’s active.
Notifications
Section titled “Notifications”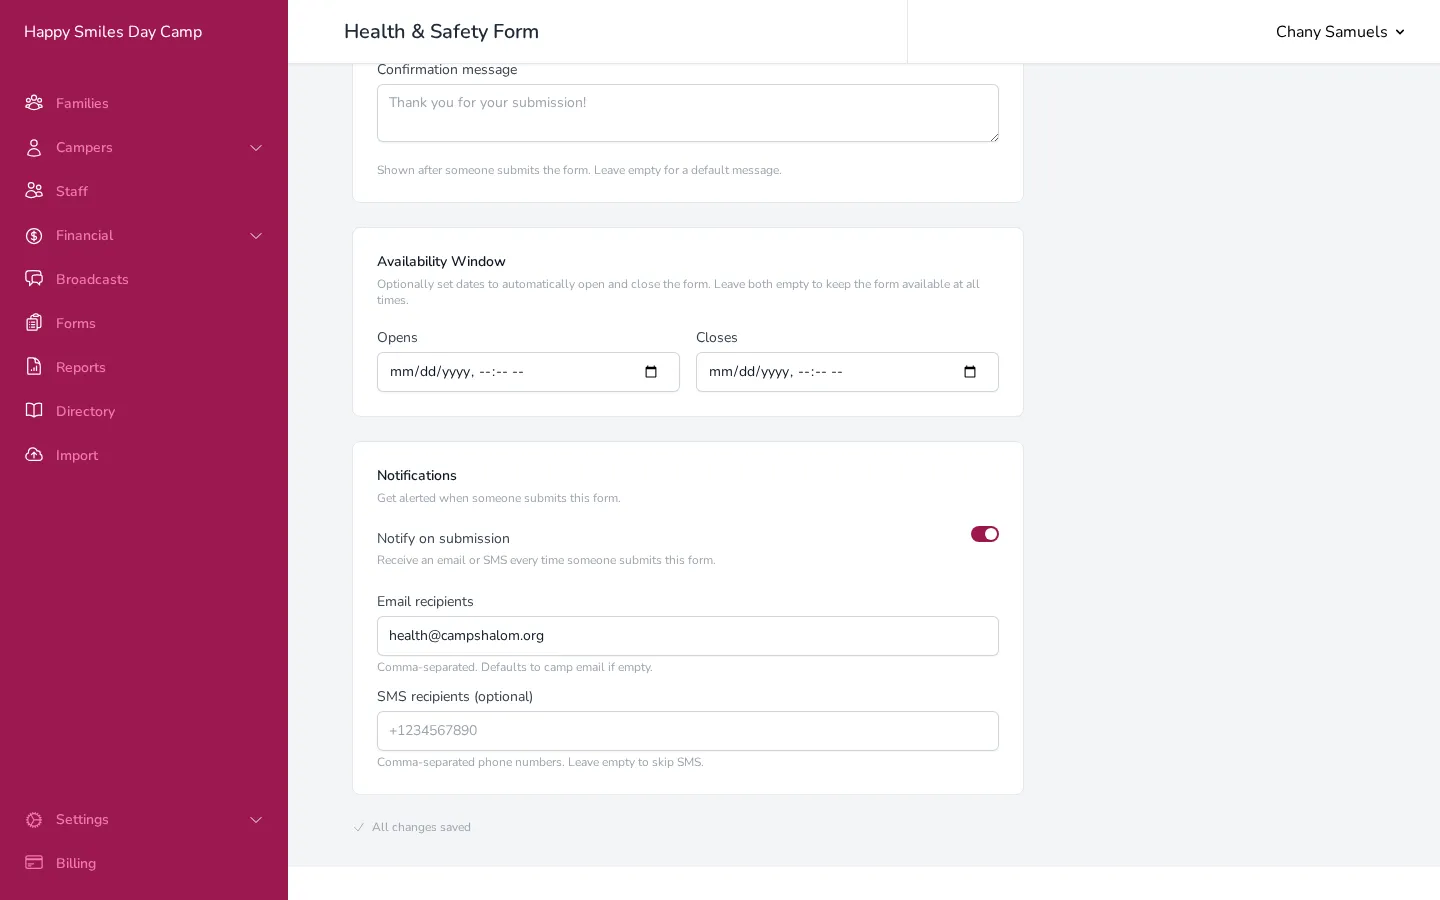
Turn on Notify on submission to receive an alert every time someone submits the form.
- Email recipients — enter one or more email addresses, separated by commas. If you leave this empty, notifications go to your camp’s main email.
- SMS recipients — optionally add phone numbers to receive a text message notification as well.
All settings save automatically as you make changes.
Adding Fields to the Canvas
Section titled “Adding Fields to the Canvas”The Fields tab is where you design what the form looks like and what it collects.
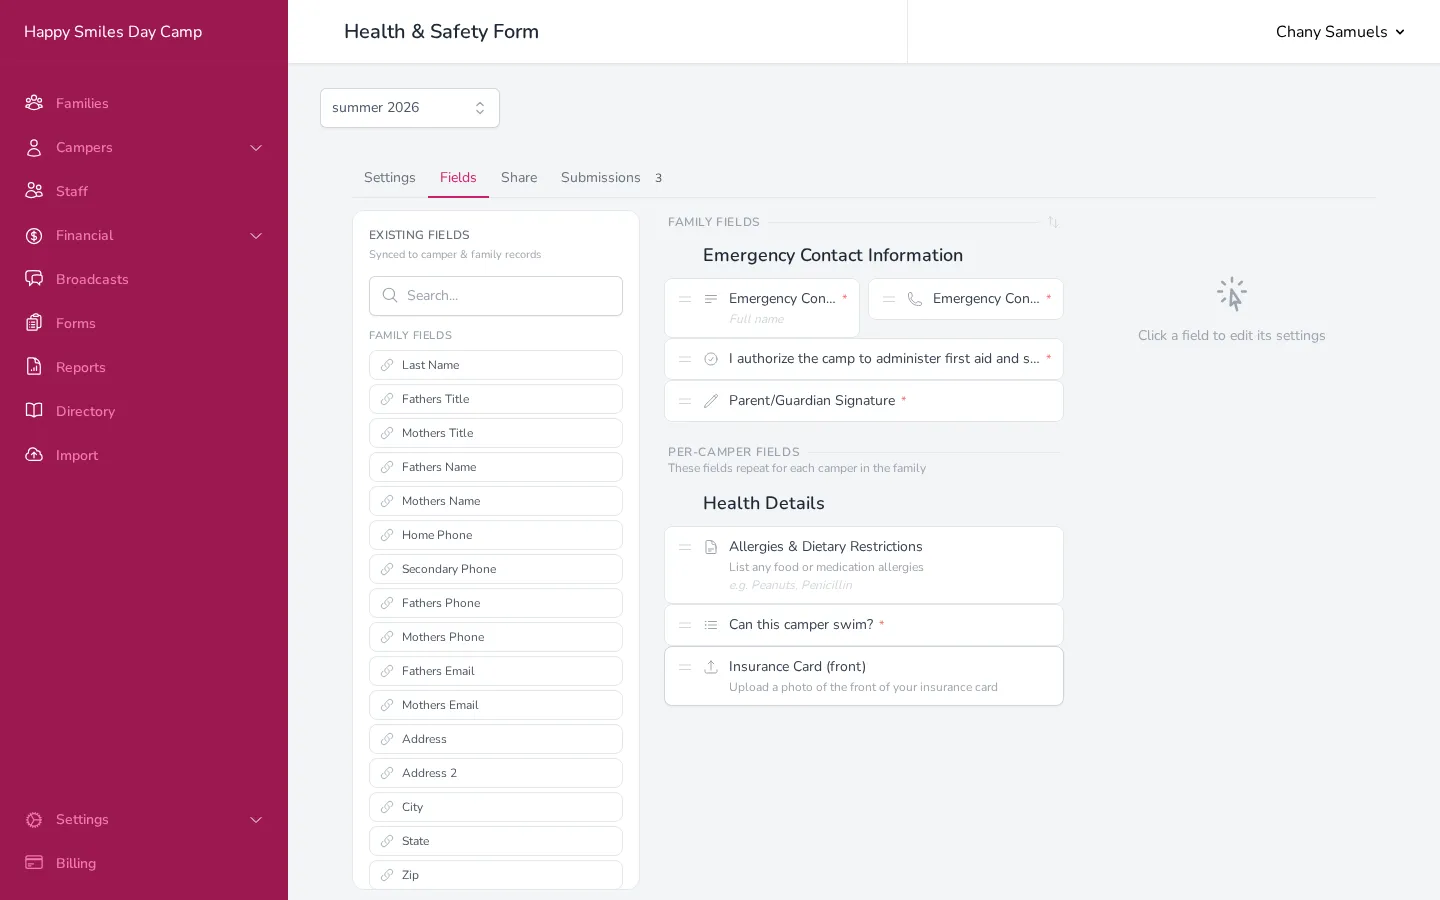
The builder has three panels:
- Left panel — the field palette, where you pick fields to add
- Center — the canvas, showing your form’s layout
- Right panel — settings for whichever field you’ve selected
Adding a Field
Section titled “Adding a Field”There are two ways to add a field:
- Click any field in the left panel to add it to the bottom of the canvas.
- Drag a field from the left panel and drop it exactly where you want it on the canvas.
When dragging, you’ll see drop zones appear — above, below, left, or right of existing fields. Dropping to the left or right of a field places them side by side on the same row.
For a full list of available field types, see Field Types.
Selecting and Editing a Field
Section titled “Selecting and Editing a Field”Click any field on the canvas to select it. The right panel will show that field’s settings.
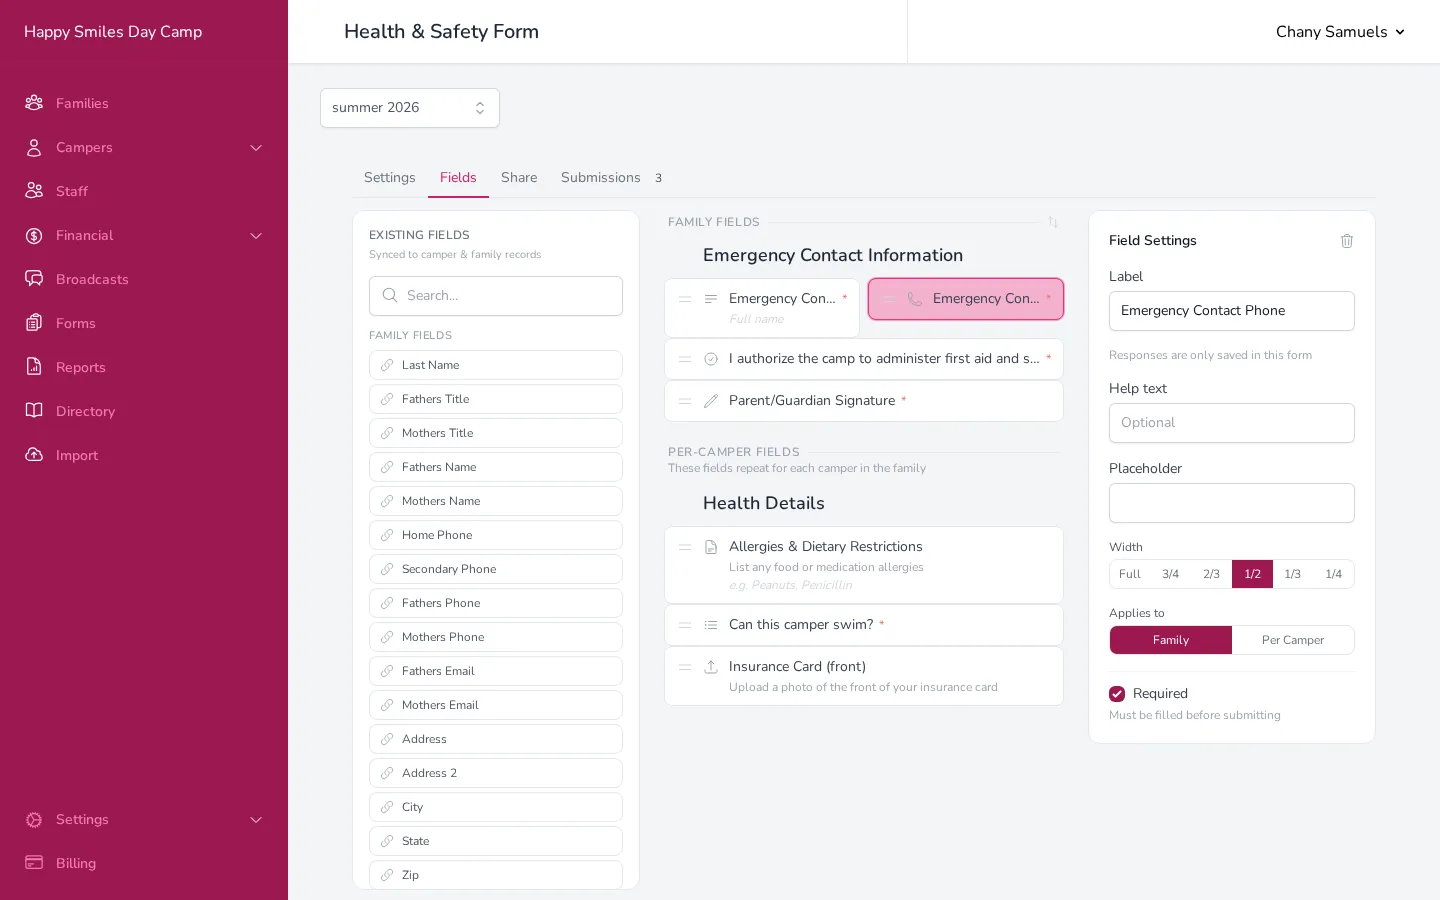
Depending on the field type, you can configure:
- Label — the name shown above the field
- Help text — a short description that appears below the label to guide the person filling out the form
- Placeholder — hint text shown inside the field when it’s empty
- Options — for dropdowns, radio buttons, and checkboxes, type each option and press Enter to add it
- Allowed file types — for file upload fields, choose between All supported, Images only, Documents (PDF, Word), or Audio only
- Width — how wide the field is. Choose Full, 3/4, 2/3, 1/2, 1/3, or 1/4. Fields on the same row share the available space.
- Applies to — whether the field belongs to the Family section (asked once) or the Per Camper section (repeated for each camper)
- Required — when checked, the field must be filled out before the form can be submitted
- Pre-fill — for linked fields only. Automatically fills in the value already on file.
- Read-only — for linked fields only. Shows the current value but doesn’t let the person change it.
Rearranging Fields
Section titled “Rearranging Fields”- Drag any field by its handle (the small icon on the left side of each field card) to move it to a new position.
- Resize fields within a row by dragging the handle that appears between two side-by-side fields.
- Swap sections — if your form has both Family Fields and Per-Camper Fields, click the arrows icon between the section headers to change which group appears first on the form.
Removing a Field
Section titled “Removing a Field”- Select the field you want to remove.
- Click the trash icon in the top right of the Field Settings panel.
- Confirm the removal. This also deletes any submission data for that field.
Layout Elements
Section titled “Layout Elements”In addition to input fields, you can add visual elements to organize your form:
- Heading — a section title to break the form into logical groups
- Text Block — a paragraph of instructions or information, with formatting and images
- Divider — a horizontal line to visually separate sections
Family Fields vs. Per-Camper Fields
Section titled “Family Fields vs. Per-Camper Fields”When your form’s scope is set to “One per family,” the canvas is split into two sections:
- Family Fields — asked once per family (emergency contacts, signatures, general questions)
- Per-Camper Fields — repeated for each enrolled camper in the family (allergies, swim ability, individual health info)
When a family with three campers opens the form, they’ll see the family fields once, then the per-camper fields three times — once for each camper, with the camper’s name shown above each group.
You can move one-off fields between sections using the Applies to toggle in the field settings panel. Linked fields are automatically placed in the correct section based on what they’re connected to.