
Approval Statuses
Approval statuses let you track where each camper stands in your enrollment process. You might have statuses like “Pending Review,” “Approved,” “Waitlisted,” or “Rejected.” Each status has a type that controls what happens when a camper is placed in it — like whether tuition charges are created or bunk assignments are cleared.
How Approval Statuses Work
Section titled “How Approval Statuses Work”Every approval status has a Status Type that determines its behavior:
- Approved — The camper is accepted. When you change a camper to an approved status, Campflow can create or recalculate their tuition charges.
- Pending — The camper is in a holding state with no side effects. Use this for statuses like “Pending Review” or “Waitlisted.”
- Rejected — The camper is not accepted. When you change a camper to a rejected status, Campflow removes them from their bunk and optionally deletes their charges.
Creating Approval Statuses
Section titled “Creating Approval Statuses”Approval statuses are managed on the Registration & Application Settings page.
- Click Settings in the sidebar, then click Registration & Application.
- Scroll down to the Approval Statuses section.
- Click Add Status (or Add Another Status).
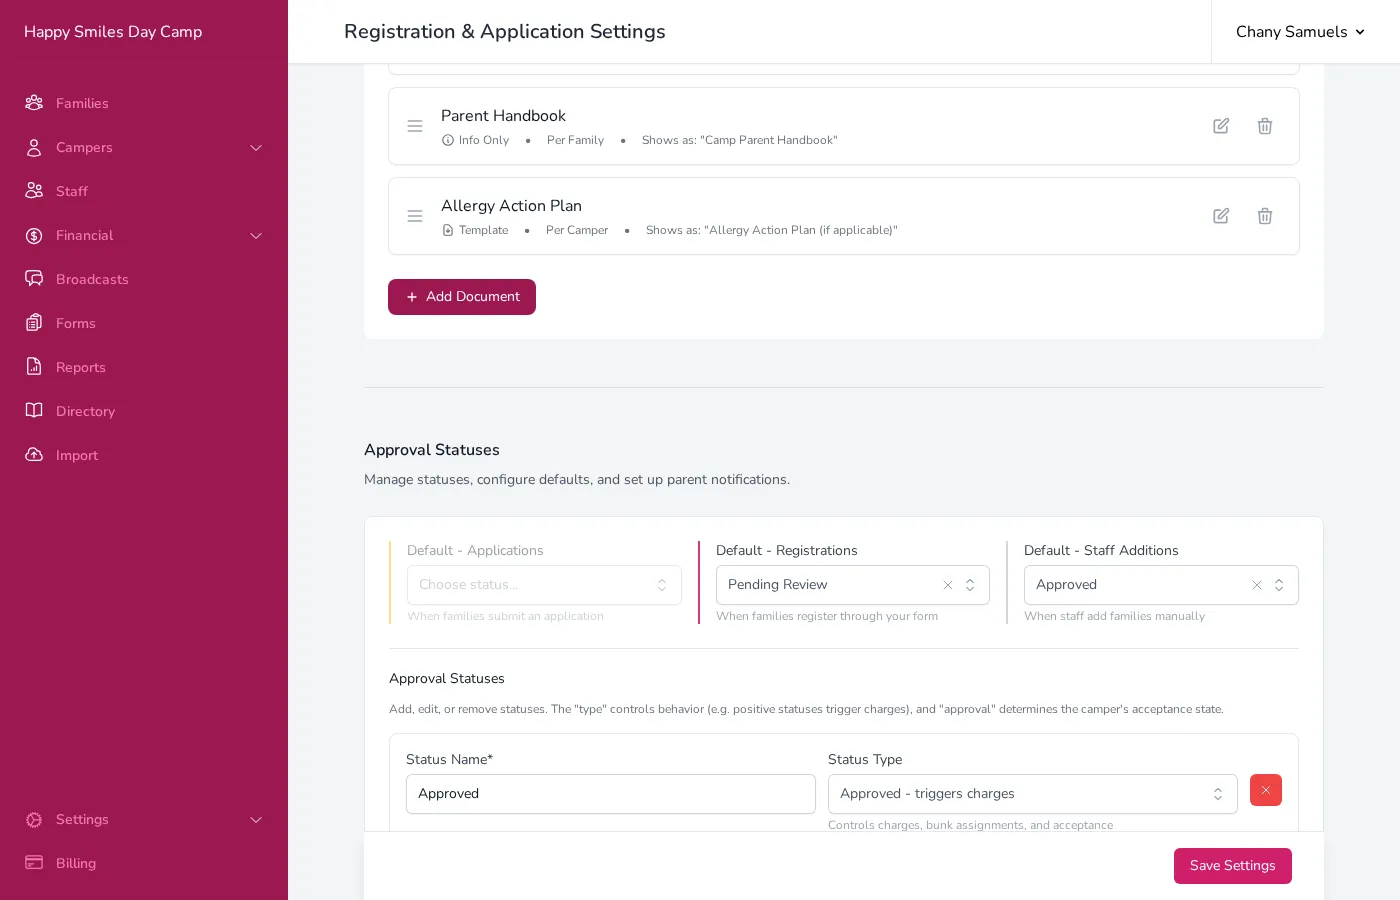
- Enter a Status Name (e.g., “Waitlisted”).
- Choose a Status Type:
- Approved - triggers charges — For statuses that mean the camper is accepted.
- Pending - no side effects — For statuses where the camper is still being evaluated.
- Rejected - removes from bunks — For statuses that mean the camper is not accepted.
- Click Save Settings.
You can create as many statuses as you need. Common setups include: Approved, Pending Review, Waitlisted, and Rejected.
Setting Defaults
Section titled “Setting Defaults”At the top of the Approval Statuses section, you can set the default status that is automatically assigned to campers in three situations:
- Default - Registrations — The status assigned when a family registers through your registration form. For example, “Pending Review” if you want to review each registration before approving, or “Approved” if you accept everyone automatically.
- Default - Staff Additions — The status assigned when you or your staff add a family manually through Campflow. Typically set to “Approved.”
- Default - Applications — The status assigned when a family submits an application (if you use the application feature).
Email Notifications
Section titled “Email Notifications”Each status can be configured to send an email to parents when a camper’s status changes to it. This is useful for notifying families that their camper has been approved, waitlisted, or rejected.
- Check the box that says Email parents when status changes to [status name].
- Choose whether the email should Send automatically (sent immediately when the status changes) or be sent manually (you will be prompted to review before sending).
- Customize the Email Template using the text editor. You can use merge tags to personalize the email with the family’s name, camper’s name, camp name, and more.
Allow Registration
Section titled “Allow Registration”Each status also has an Allow registration when in this status option. When checked, campers with this status can access the registration form. This is useful for workflows where families apply first, get approved, and then complete their full registration.
Good to Know
Section titled “Good to Know”- When you change a camper to a rejected status, Campflow will ask if you want to delete their existing charges. You can choose to keep or remove them.
- When you change a camper to an approved status, Campflow will ask if you want to create or recalculate their tuition charges based on their enrollment details.
- Approval statuses are shared across all seasons — you set them up once and they are available for every season.
- You can change a camper’s approval status from the camper table, the family detail page, or the grades page. For more details, see Approval Workflow.