
Camp Profile & Branding
The General settings page is where you configure your camp’s identity, season details, pricing, and more. Everything on this page is shared across your entire camp — it affects what parents see on registration forms, what appears on statements, and how Campflow calculates charges.
To get here, click Settings in the sidebar, then click General.
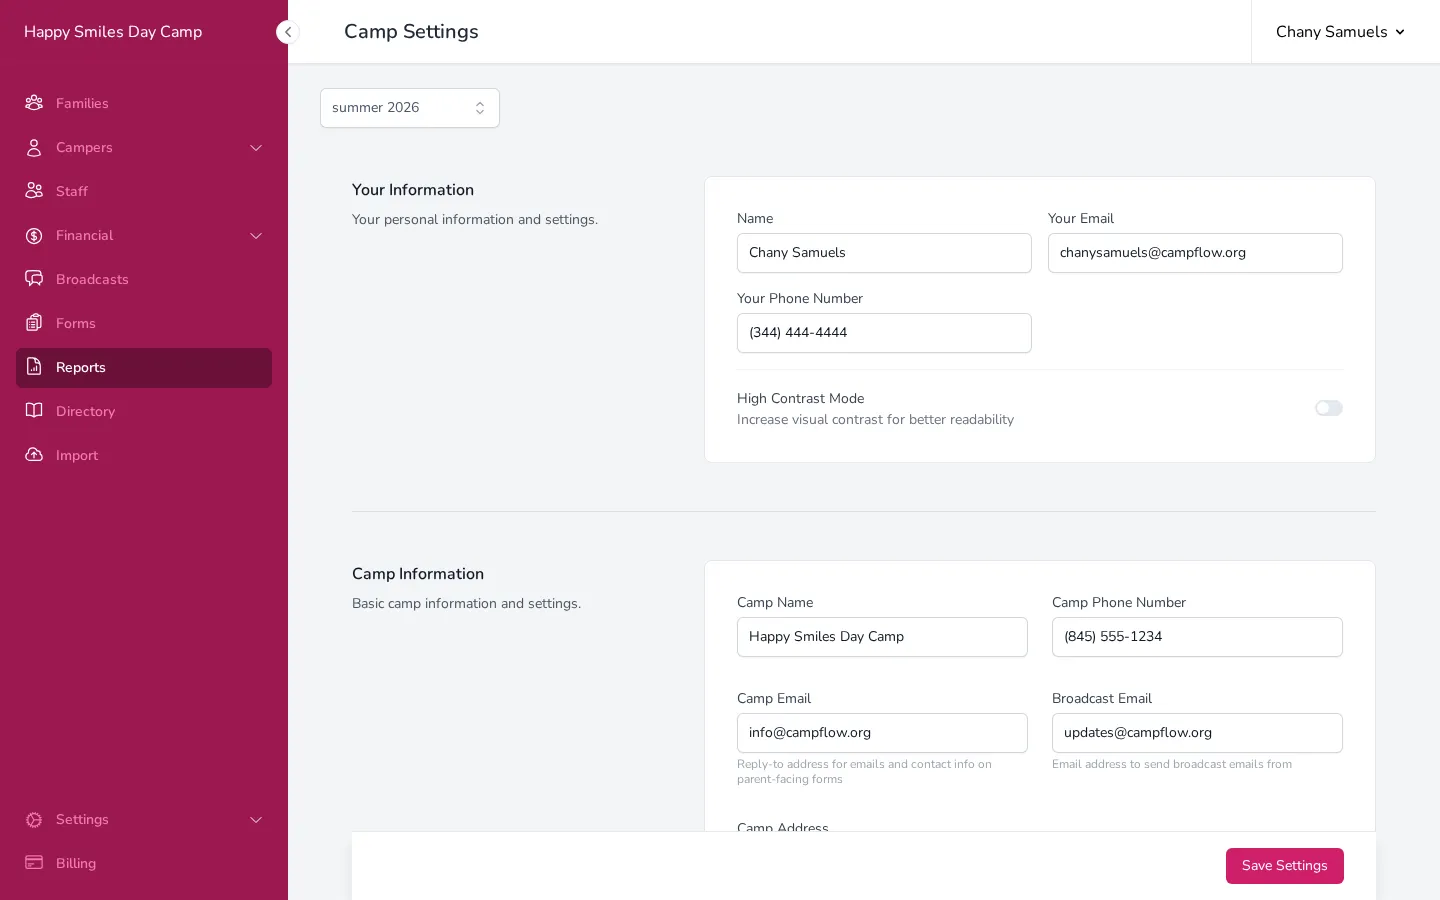
Your Information
Section titled “Your Information”This section is about you — the person currently logged in. It’s not shared with parents.
- Enter your Name, Email, and Phone Number.
- Turn on High Contrast Mode if you’d like increased visual contrast for better readability. This is a personal preference that only affects your account.
Camp Information
Section titled “Camp Information”This is your camp’s public-facing identity. The name, phone, and email you enter here appear on registration forms, receipts, and communications sent to parents.
- Enter your Camp Name and Camp Phone Number.
- Enter your Camp Email. This is the reply-to address on emails and the contact info shown on parent-facing forms.
- Optionally, enter a Broadcast Email. This is the “from” address when you send broadcast emails. For best deliverability, use a domain email address rather than a free email like Gmail or Yahoo — free email addresses are much more likely to end up in spam.
- Enter your Camp Address. This appears on statements and parent-facing materials.
- If your mailing address is different from your camp address, uncheck Same as Camp Address and enter the mailing address separately.
- Optionally, enter your Tax ID / EIN. Check Show on statements to print it in the header of family statements — useful when parents need it for tax purposes. Leave the box unchecked and the number stays off statements.
- Choose a Main Color. This is used as the accent color on registration forms and other parent-facing pages.
- Select your Camp Gender — Male, Female, or NA (for mixed/co-ed camps).
Dropdown Options
Section titled “Dropdown Options”Below the core camp info, you’ll find fields for common dropdown options used during registration:
- Shirt Sizes — Type each size and press Enter to add it. Drag to reorder. These appear as options when parents register.
- Shoe Sizes — Same as shirt sizes. Add the sizes your camp uses.
- Yeshiva/School Options — If you want parents to pick from a predefined list of schools, add them here. Leave this empty to let parents type any school name. You can also check Include ‘Other’ option to let parents enter a school not on your list.
Feature Toggles
Section titled “Feature Toggles”- Track Fees & Payments — Turn this on if you want to use Campflow’s financial features (charging families, recording payments, etc.).
- Track Budgets & Expenses — Turn this on to use the expense tracking and budgeting features.
- Enable Jewish Features — Turns on Hebrew name fields, Hebrew birthday calculations, and other features relevant to Jewish camps.
Camp Logo
Section titled “Camp Logo”Upload your camp’s logo, which appears on the registration form header. We recommend a square image, and the file must be under 2MB. Click the upload area to choose a file, or if you already have a logo, click Replace to change it or Remove to delete it.
Camp Season
Section titled “Camp Season”Each season in Campflow has its own dates and pricing. The settings here apply to whichever season is currently selected in the season chooser at the top of the page.
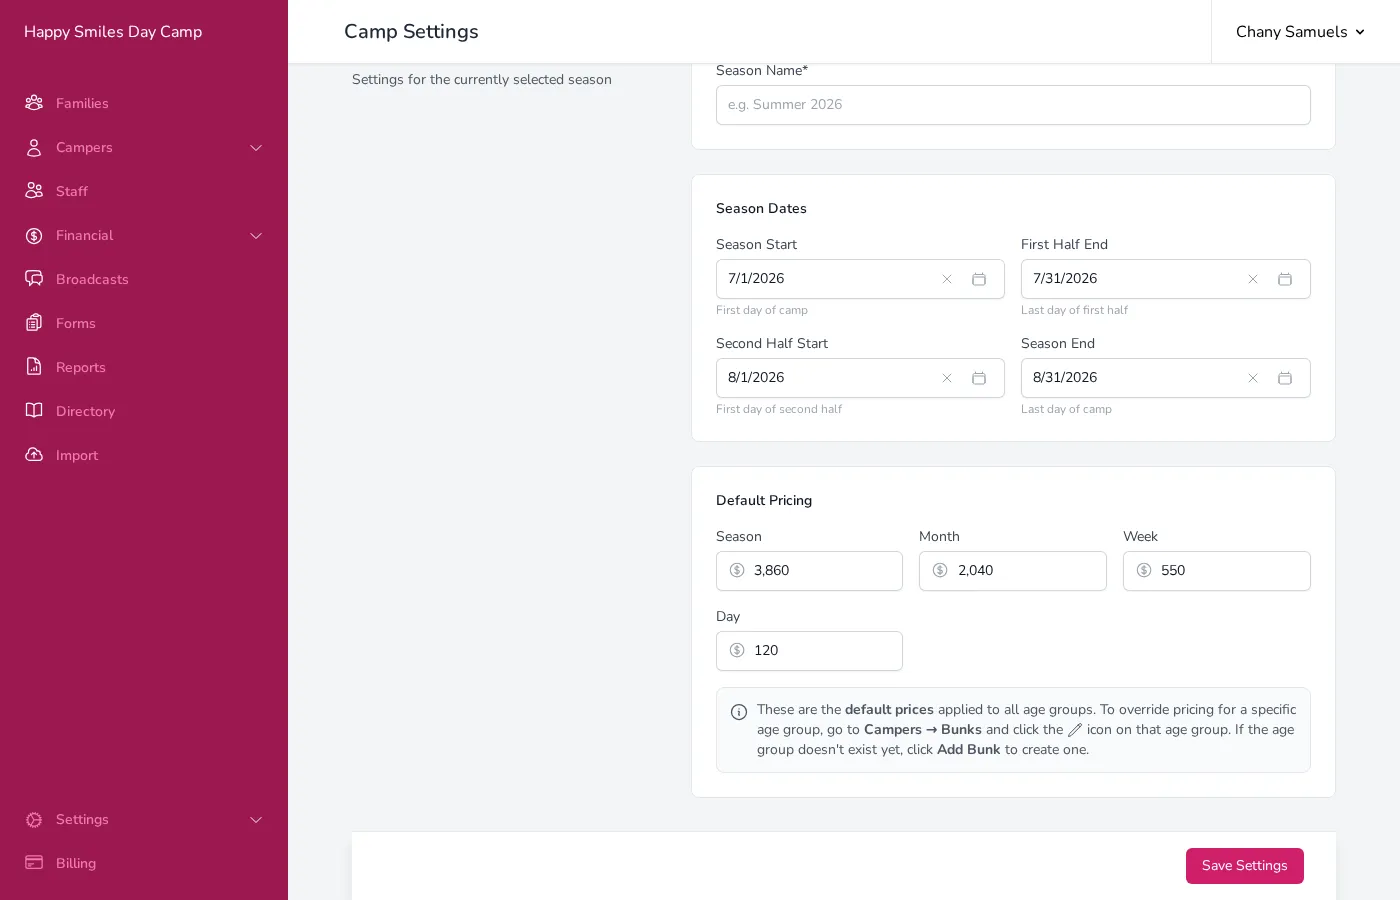
Season Name
Section titled “Season Name”Give your season a name, like “Summer 2026.” This helps you identify it throughout the system.
Season Dates
Section titled “Season Dates”Set the four key dates that define your season:
- Season Start — The first day of camp.
- First Half End — The last day of the first half.
- Second Half Start — The first day of the second half.
- Season End — The last day of camp.
These dates are used to calculate charges when a camper enrolls for a specific term (full season, first half, second half, etc.).
Default Pricing
Section titled “Default Pricing”Enter the base prices for each term type:
- Season — The full-season price
- Month — The per-month price
- Week — The per-week price
- Day — The per-day price
These are the default prices applied to all campers. If you need different pricing for a specific age group, you can override it on the Bunks page — the info box beneath the pricing fields explains how.
Departments & Grades
Section titled “Departments & Grades”This section lets you organize your campers into departments (like “Junior Division” or “Senior Division”) and grade levels within each department. You can drag items to reorder them.
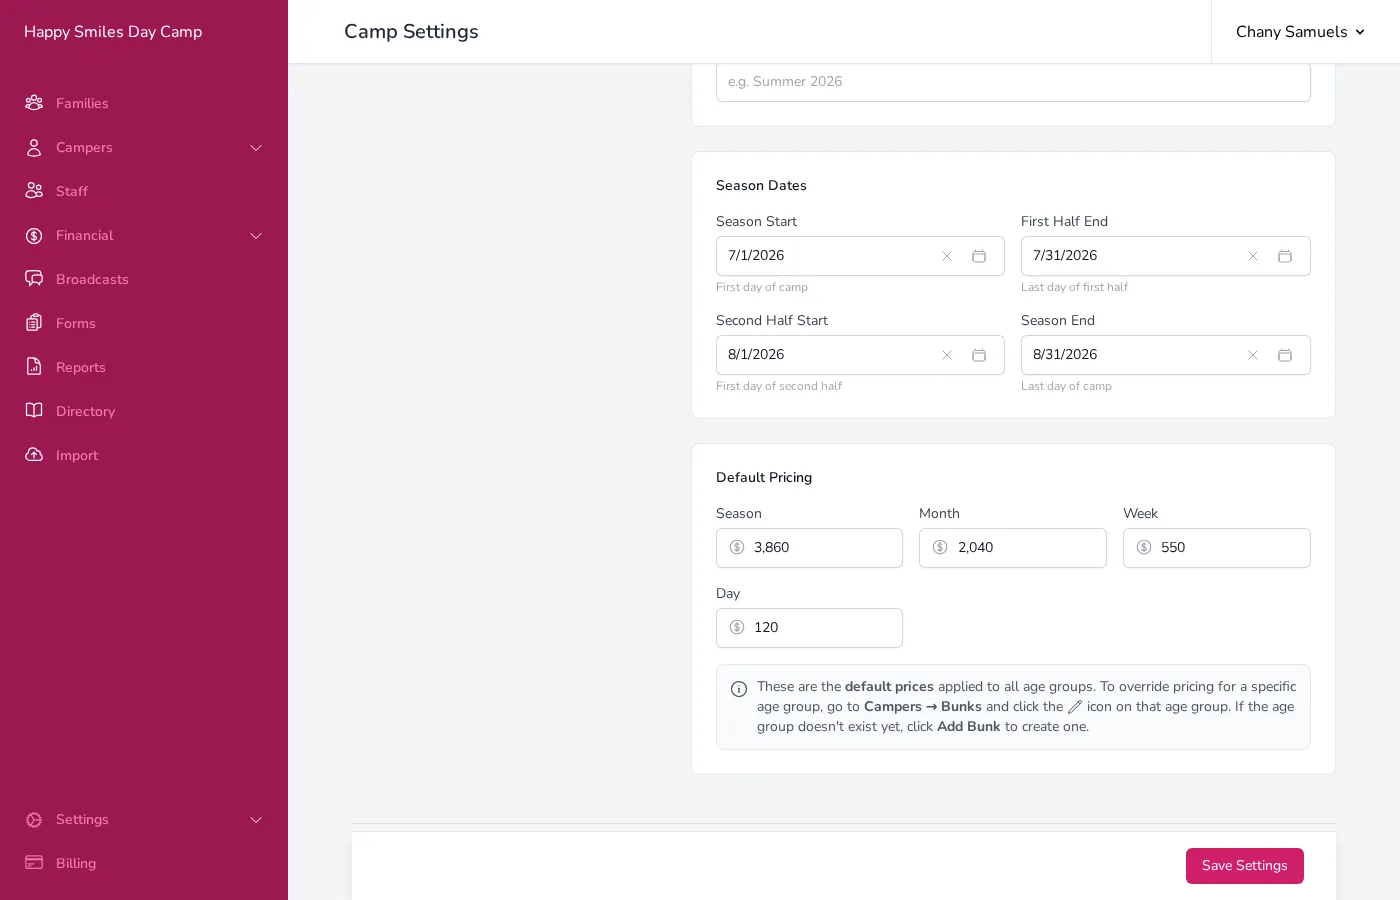
To learn more about managing departments and grades, see the Grades documentation.
Colonies
Section titled “Colonies”If your camp serves specific bungalow colonies, or if pricing differs between on-ground and off-ground campers, you can set up colonies here. Each colony can have its own contact information, address, and price adjustment.
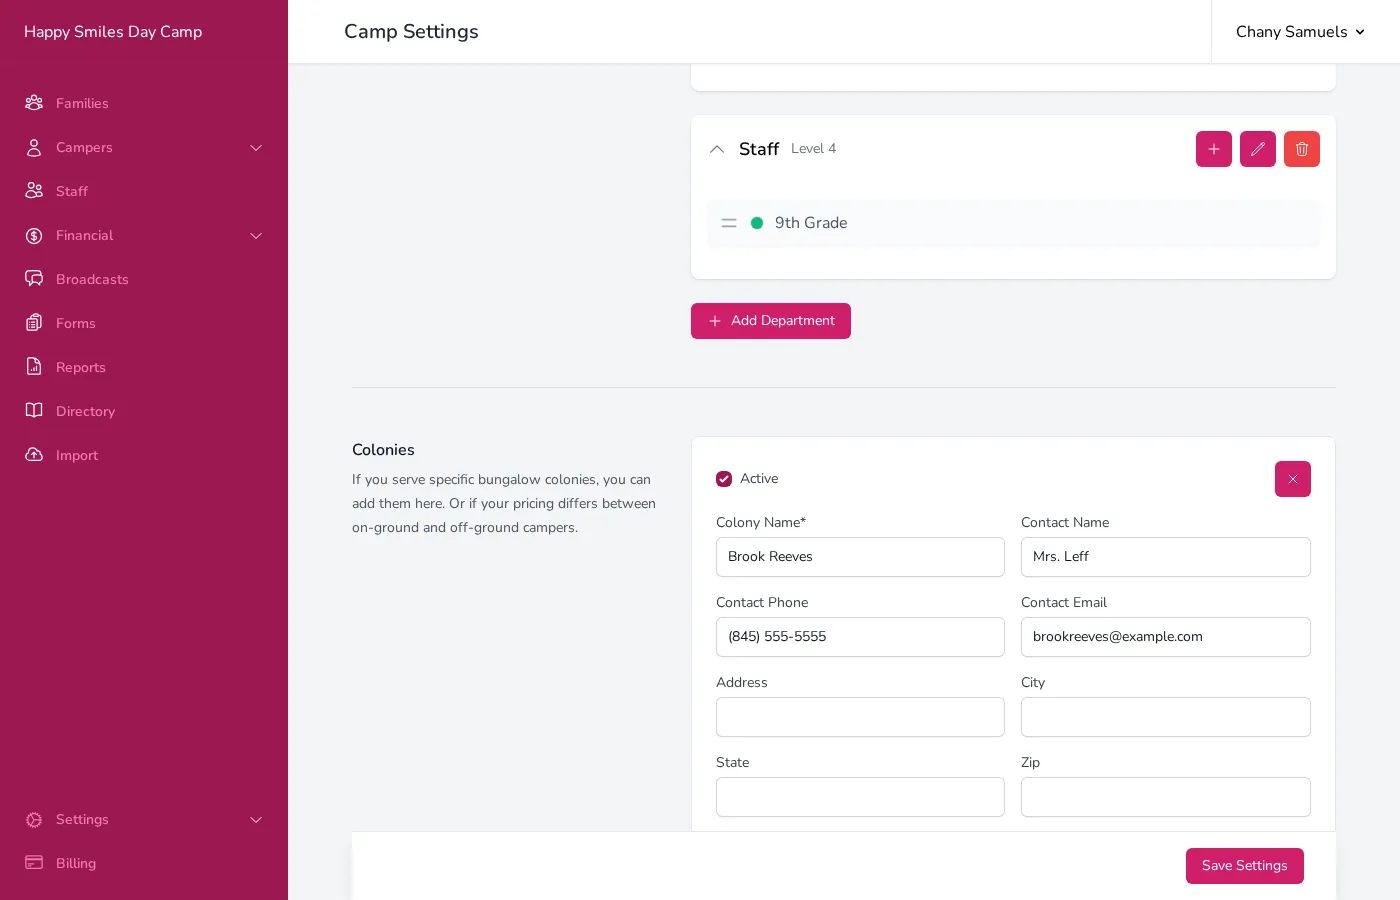
How to Add a Colony
Section titled “How to Add a Colony”- Click Add Colony (or Add Another Colony if you already have one).
- Enter the Colony Name and optionally fill in the contact and address details.
- Set a Price Adjustment if this colony’s pricing differs from the default. Enter a positive number to add to the price, or a negative number to discount (for example, -50 for a $50 discount).
- Choose the Price Adjustment Type — either Dollar (a flat amount) or Percent (a percentage of the base price).
- If using a percentage, you can set Round to Nearest to clean up uneven numbers (round to the nearest $1, $5, $10, $25, $50, or $100).
When a price adjustment is set, Campflow shows you the Effective Pricing — the original price crossed out next to the adjusted price, so you can verify the math at a glance.
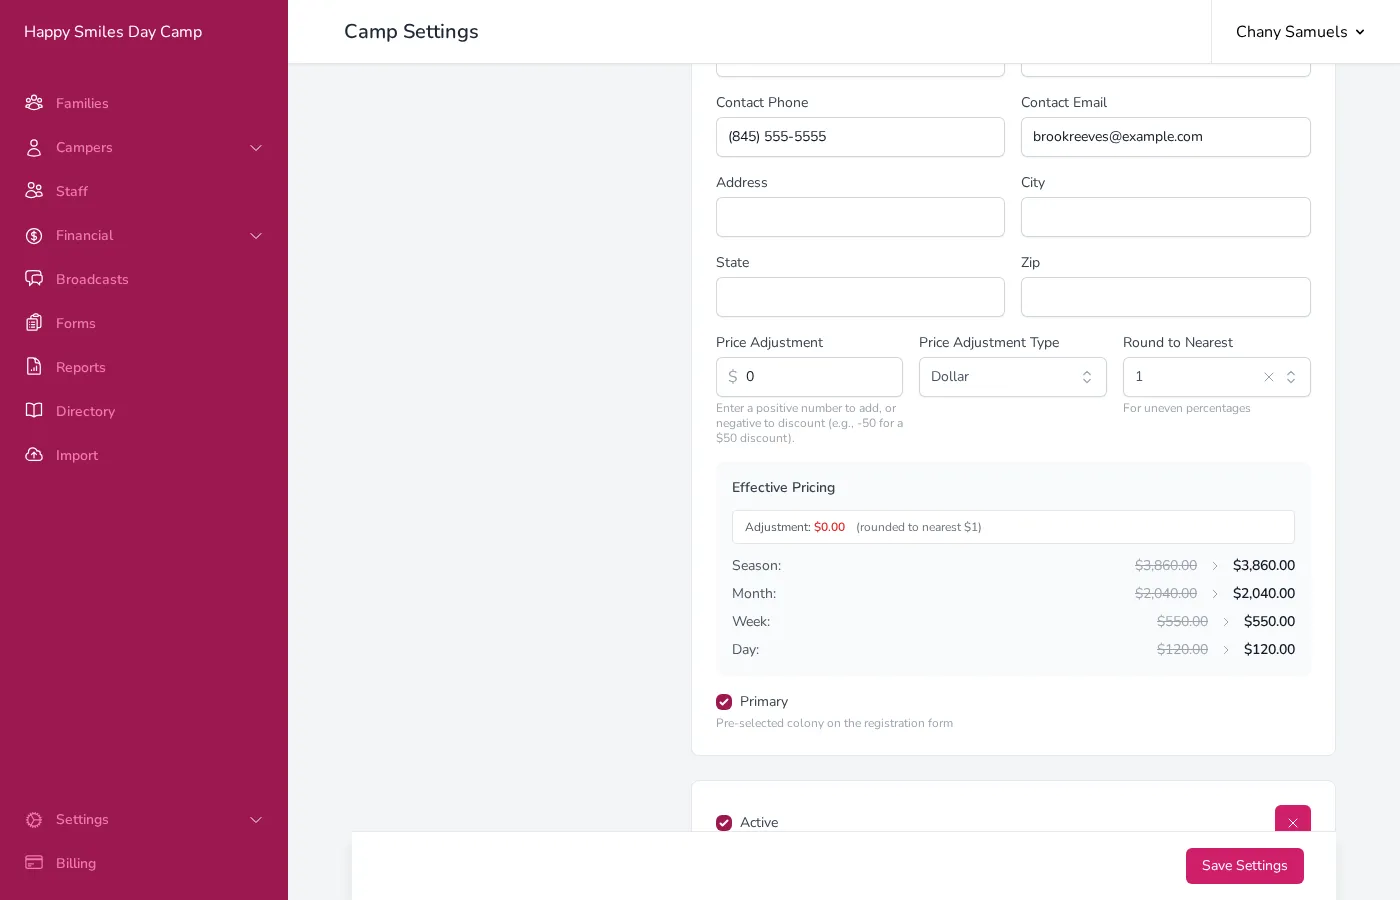
- Check Primary to make this colony the pre-selected option on the registration form.
- Uncheck Active to hide a colony without deleting it.
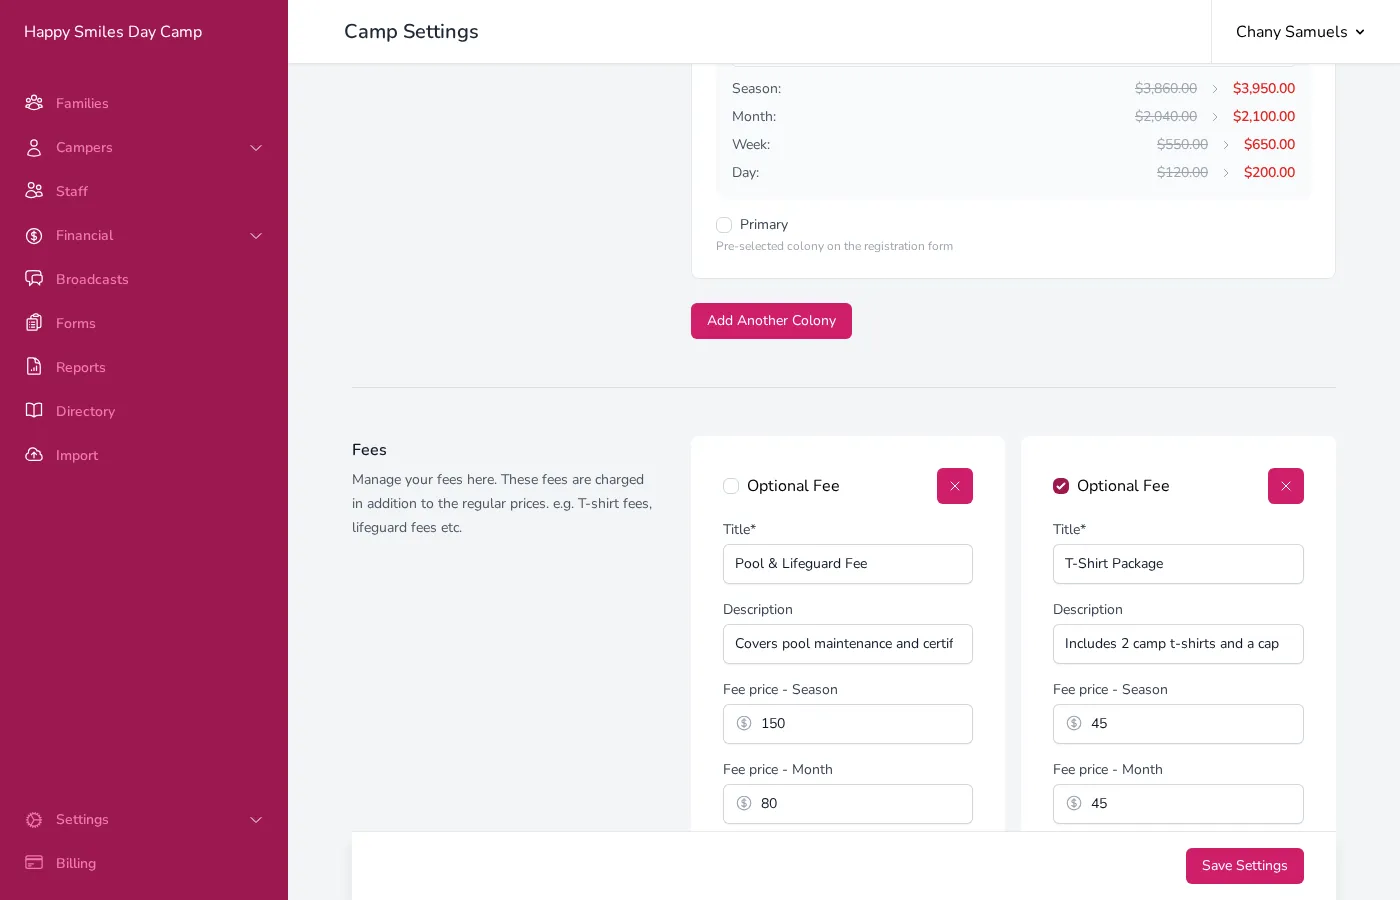
Fees are charges added on top of the base tuition — things like t-shirt fees, lifeguard fees, or trip fees. Each fee has its own price for each term type (season, month, etc.).
How to Add a Fee
Section titled “How to Add a Fee”- Click Add Fee (or Add Another Fee).
- Enter a Title for the fee (e.g., “Pool & Lifeguard Fee”).
- Optionally add a Description that explains what the fee covers.
- Enter the fee price for each term type (Season, Month, etc.).
- Check Optional Fee if this fee should not be automatically applied to every camper. Optional fees can be added to individual campers as needed.
To remove a fee, click the X button in the top right corner of the fee card.
Accepted Payment Methods
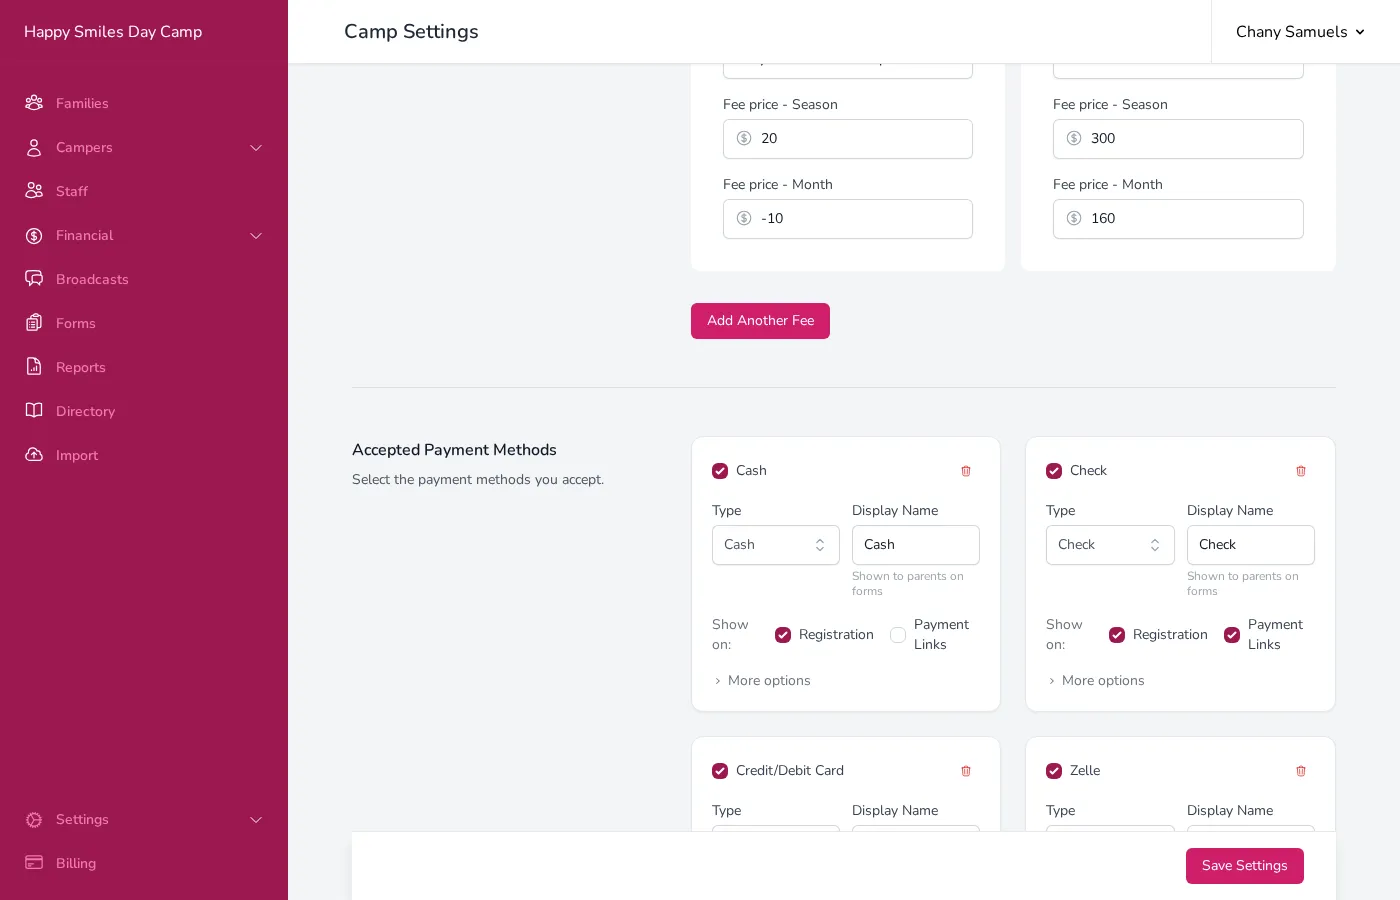
Section titled “Accepted Payment Methods”This section controls which payment methods your camp accepts and how they appear to parents on registration forms and payment links.
How to Add a Payment Method
Section titled “How to Add a Payment Method”- Click + Add Payment Method.
- Choose a Type from the list (Cardknox, Cardknox ACH, Cash, Check, Credit, Zelle/Quickpay, Venmo, or Matbia).
- Enter a Display Name — this is what parents see on forms (e.g., “Credit Card” instead of “Cardknox”).
- Check where to Show on — Registration (the registration form) and/or Payment Links (links you send to families for payment).
- Click More options to configure additional settings for that payment method.
More Options
Section titled “More Options”Each payment method has additional settings you can configure:
- Processing fee — If you pass processing fees to parents, enter the percentage and/or fixed amount here. Campflow will show a preview of what a $100 payment would become with the fee applied.
- Default Status — The status automatically assigned to payments using this method. For example, cash is usually “Accepted” immediately, while checks might be “Pending” until they clear.
- Note to Users — Optional instructions displayed to parents when they select this method.
Some payment methods have their own specific settings:
- Check — Set who checks should be made payable to, the mailing address, and whether to require a check image upload.
- Zelle/Quickpay — Enter your Zelle email or phone, and optionally require a screenshot or confirmation number.
- Venmo — Enter your Venmo handle, and optionally require a screenshot or transaction ID.
- Cardknox / Sola — Enter the keys provided by your payment processor (Cardknox / Sola) to enable online credit card or ACH payments.
The Credit type is special — it’s for internal credits only and is never shown to parents on public forms.
To deactivate a payment method without deleting it, uncheck the checkbox next to its name. To delete it entirely, click the trash icon.
Saving Your Changes
Section titled “Saving Your Changes”After making changes to any section on this page, scroll to the bottom and click Save Settings. The save button stays visible at the bottom of the screen as you scroll, so you can save from anywhere on the page.
Good to Know
Section titled “Good to Know”- Changes to season dates and pricing affect the currently selected season only. Use the season chooser at the top of the page to switch between seasons.
- If you change default pricing, it won’t retroactively change charges that have already been calculated for existing families. It only affects new enrollments.
- Only users with the Edit Settings permission can make changes on this page. Users with View Settings can see the page but can’t save changes.